Given that not everyone has the latest viewer I understand it is still necessary to make a separate sculpty for the mirror half of an object rather than just using the mirror toggle in the edit panel inworld.
Is there a simple way of doing this by modifying the first sculpt map after it's been baked? Using Paintshop Pro I tried mirroring the map image but that created an inside out copy, flipping it doesn't seem to make any difference at all, and mirroring plus flipping just produced a duplicate of the original object. I also tried changing the x dimension to a negative value but all that did was flatten the object.
Thanks for help.
Welcome to the Second Life Forums Archive
These forums are CLOSED. Please visit the new forums HERE
Mirroring sculpties |
|
|
Carbon Philter
Registered User
Join date: 4 Apr 2008
Posts: 165
|
01-15-2009 10:16
|
|
Chosen Few
Alpha Channel Slave
Join date: 16 Jan 2004
Posts: 7,496
|
01-15-2009 10:28
You'd want to invert or flip one or two of the channels, not all three. PSP won't make that quite as easy for you as Photoshop would, since PSP has no channels palette. If I remember correctly, PSP does allow you to split an image's channels into three separate grayscale images. From there, you can edit, and then recombine at the end.
I think the commands are Image -> Split Channel -> Split to RGB, and Image -> Combine Channel -> Combine from RGB. But I could be wrong. It's been a while. Depending on what modeling program you're using, it might be easier just to do your mirroring there, instead of messing with the maps. In Maya, it's like 2-clicks and you're all set. In some of the other programs, like Wings and such, that require exact vertex ordering from premade templates, it might be more complicated. _____________________
.
Land now available for rent in Indigo. Low rates. Quiet, low-lag mainland sim with good neighbors. IM me in-world if you're interested. |
|
Carbon Philter
Registered User
Join date: 4 Apr 2008
Posts: 165
|
01-15-2009 10:41
Thanks for the quick reply, Chosen.
I'm using Blender and am still on the learning curve in both it and PSP. The PSP process has the option to split to RGB, HSL or CMYK but what I'd do once making the split would be pure and simple guesswork! Creating a mirrored object in Blender sounds way more straightforward than the channels messing, though I'll maybe try it when I've upped the skill level a bit. |
|
Gaia Clary
mesh weaver

Join date: 30 May 2007
Posts: 884
|
01-15-2009 11:06
Thanks for the quick reply, Chosen. I'm using Blender and am still on the learning curve in both it and PSP. The PSP process has the option to split to RGB, HSL or CMYK but what I'd do once making the split would be pure and simple guesswork! Creating a mirrored object in Blender sounds way more straightforward than the channels messing, though I'll maybe try it when I've upped the skill level a bit. You may want to first create a copy of your sculptie. do that in object mode: Use SHIFT-d and move the mouse. the new object will be dragged out of the existing object as a copy. You can select the active object by right clicking it. the active object is marked with a pink outline... But you do not need to do a copy first. You just can mirror the existing object if you prefer. Mirroring goes like this: 1.) go to edit mode 2.) press "m x" or "m y" or m z" to mirror along the x,y,z axis. You may want to first go to front, side or top view, so you have better visual control about how your mirroring works. HINT: If you try to mirror in object mode, the mirror effect will NOT propagate to the sculpt map. So you MUST mirror in edit mode... Another hint: You also can mirror along the center of the object: i use scale for this: in edit mode: s -1 ( s minus one) so all vertices are mirrorored along the objects center of mass... you might also want to watch this tutorial: http://blog.machinimatrix.org/2008/08/24/the-blender-primer/ to get some light weight infos about first steps with blender. have fun ") |
|
Carbon Philter
Registered User
Join date: 4 Apr 2008
Posts: 165
|
01-15-2009 15:16
Thanks, Gaia.
Not so difficult really. ") I've done all your other tutorials and found them extremely useful and they really constitute all I understand about Blender. Have to confess I reckoned I knew enough to skip the primer tutorial and went straight to the sculpt texturing and LOD stuff - smack my leg! I'll go back and do the primer, honest. |
|
Carbon Philter
Registered User
Join date: 4 Apr 2008
Posts: 165
|
01-15-2009 15:40
Chosen, or other knowledgable ones,
Tried the splitting the sculpty map to the three channels in PSP - no problem. The trick presumably is swapping the input when recombining, e.g. using the red channel as the blue channel etc. Only trouble is which of the various combinations will result in the mirror sculpt map. Any ideas before I set about perming all the alternatives? Edit to help others out.......... Tried swapping the r,g,b channels with no success so started inverting each separated channel (negative image). I got the correct sculpt map for the mirror by inverting the red channel and recombining. Now, would it be just too much of a coincidence that the red channel relates to the red axis in SL or have I just had an epiphanetic experience in my understanding of the modelling process?  |
|
Chosen Few
Alpha Channel Slave
Join date: 16 Jan 2004
Posts: 7,496
|
01-15-2009 19:50
I'm glad to hear you got it figured out, Carbon.
As for the color coordination, it's more coincidence than anything else, but yes, it does line up. Red, green, and blue translate to X, Y, and Z, respectively. You'll find that's a common theme in a lot of 3D modeling programs, but it's not exactly a standard, as far as I know. _____________________
.
Land now available for rent in Indigo. Low rates. Quiet, low-lag mainland sim with good neighbors. IM me in-world if you're interested. |
|
Mickey Heaney
Registered User
Join date: 20 Dec 2005
Posts: 51
|
01-25-2009 19:31
Would it be possible for someone to walk me through the process for mirroring the sculpt map in PhotoShop? I would like to mirror a sculpt for a wing so that it can be seen in older viewers. I'm not sure how to "invert" the channel in PSP. Thanks in advance.
|
|
Mickey Heaney
Registered User
Join date: 20 Dec 2005
Posts: 51
|
01-25-2009 19:40
OK, figured out how to invert the red channel, then recombine, but no luck with the sculpt map. I'm seeing contouring that isn't there on the original. Any suggestions?
|
|
Mickey Heaney
Registered User
Join date: 20 Dec 2005
Posts: 51
|
01-25-2009 19:48
OK, got it. Had to horizontally flip the map, then invert the green channel, then recombine. Whew. Still not "exact", which I don't quite understand, but pretty close.
|
|
Carbon Philter
Registered User
Join date: 4 Apr 2008
Posts: 165
|
01-26-2009 03:16
OK, got it. Had to horizontally flip the map, then invert the green channel, then recombine. Whew. Still not "exact", which I don't quite understand, but pretty close. I'm not sure why you had to do the flip and green channel, Mickey. Trying to apply logic to the process my reasoning is that if the object is a mirror image in just the one axis ( red if it's left and right - at least using the modelling axes the way I do it in Blender) all you should need to invert is the red channel as I did for my object. That's on the basis that inverting the channel makes 'in' become 'out' or 'up' become 'down' - my simplistic take on the maths of changing positive/negative values ranging from -128 to +128 around the neutral 0 point. If the object has to be mirrored in more than one plane that might get pretty tricky - think I'll stay way from that! |
|
Betty Doyle
Ingenue

Join date: 15 Aug 2006
Posts: 336
|
01-26-2009 04:15
I tried out this method of mirroring in PS just out of curiousity last week, and I had to do it the way Mickey did. I used a sculpt I had made in zBrush. I always have to flip the .bmp file horizonitally for zbrush sculpts in PS so that they won't be inside out in SL. When I tried flipping the red channel back, the sculpt in SL ended up inside out again. So I tried flipping the green one instead, and that one worked.
_____________________
Ingenue :: Fashion with a Past ::
http://ingenuevintage.wordpress.com http://slurl.com/secondlife/Lo%20Lo/201/99/21/ |
|
Carbon Philter
Registered User
Join date: 4 Apr 2008
Posts: 165
|
01-30-2009 08:07
Mirror in blender: HINT: If you try to mirror in object mode, the mirror effect will NOT propagate to the sculpt map. So you MUST mirror in edit mode... Need to readdress this mirroring thing, guys. I seem to have trouble making sure the mirrored sculpty isn't inside out when I import it to SL. There's also another short thread on the same thing: /8/a5/303810/1.html In Blender 2.48a I used shift/D to duplicate the component in object mode, moved it, changed to edit mode, selected all and mirrored to along the x axis. Looks fine but when I bake the sculpty map firstly it keeps the same sculpt map name as the original it was duplicated from, and then after I've manually changed that, when I import it into SL it arrives inside out and I get annoyed! Any explanations from the cognoscenti - for the problem, not my shortness of temper? |
|
Gaia Clary
mesh weaver
Join date: 30 May 2007
Posts: 884
|
01-30-2009 09:58
In Blender 2.48a I used shift/D to duplicate the component in object mode, moved it, changed to edit mode, selected all and mirrored to along the x axis. Looks fine but when I bake the sculpty map firstly it keeps the same sculpt map name as the original it was duplicated from, and then after I've manually changed that, when I import it into SL it arrives inside out and I get annoyed! Any explanations from the cognoscenti - for the problem, not my shortness of temper? The inside/out effect is based on the fact, that sculpted prims are made out of surfaces, which are textured on one side, but completely invisible on the other side. So if for any reason the inside and outside of a sculptie gets swapped, the effect appears. From all my testings i only could reliably force the effect to appear, when i go to edit mode and scale either 1 axis, or all 3 axes to -1. These operations turn the normals around by 180 degrees and so the inner side and the outer side of the object get exchanged. And from all i can tell, it should be so that when you recalculate the normals (Mesh -> Normals -> recalculate outside) the effect should disappear, regardless how you got the object into the inside/out state. That's the theory. But sometimes i see no change at all in the baked sculptmesh, after applying the normals recalculation. There may be a bug either directly in blender, or in the sculptie creation routine of Domino's scripts, which sometimes do not recognize, that the normals have been recalculated ? And of course you always can cure the effect by mirroring the sculptmesh itself (not the model) along the x-axis when the inside/out effect has infected your model. Another reliable workaround seems to be: - bake sculpt mesh, export it and reimport it to blender - Mesh -> normals -> recalculate outside - bake sculpt mesh And since that works, it looks like an additional proof that there is a bug somewhere in blender or the scripts, or i simply do not understand at all, what really happens here |
|
Paulo Dielli
Symfurny Furniture
Join date: 19 Jan 2007
Posts: 780
|
02-28-2009 17:06
OK, got it. Had to horizontally flip the map, then invert the green channel, then recombine. Whew. Still not "exact", which I don't quite understand, but pretty close. I did the same: flip the entire sculpty map, and then invert the red channel (not the green, the red worked for me in Photoshop). But I also see that the sculpt is not exactly the same as the original. It's a good mirror alright, but on some places there are hard angles where they were smooth on the original. When I use Gaia's workaround in Blender (see above), I see the same effect. Some vertices get replaced. I could correct it manually in Blender but that's much work, since I've made a lot of models in Blender using the mirror tool. Now my question is this: soon the RC 1.22 will become the regular viewer. Although there will still be people who use older viewers than 1.21.6 (regular) and the new 1.22 (RC), does anybody have a clue about how many SL users will keep on using older viewers? In other words: should I do all this work in Blender (many weeks of work!) to manually correct all mirrored sculpties or just accept the fact that in-world mirrored sculpties don't look right for people with older viewers? |
|
Gaia Clary
mesh weaver
Join date: 30 May 2007
Posts: 884
|
02-28-2009 17:42
When I use Gaia's workaround in Blender (see above), I see the same effect. Some vertices get replaced. I could correct it manually in Blender but that's much work, since I've made a lot of models in Blender using the mirror tool. Which version of the scripts do you use ? the RC-scripts or the released scripts? Can you provide an example on which the effect can be seen ? It would be best if you can provide a .blend file with an example of missplaced vertices... |
|
Paulo Dielli
Symfurny Furniture
Join date: 19 Jan 2007
Posts: 780
|
03-01-2009 10:25
Gaia, I've checked it again and again in Blender and in-world. I've used the process that you described. So in Blender:
- Imported my sculpty .tga file: in the original blend-file it was mirrored properly. When I imported the tga it wasn't mirrored anymore, but that was to be expected. - Went into edit mode and mirrored the sculpt on the X-axis. Mirroring worked. - In Blender I baked a new tga sculpt texture. - Reimported this new texture in Blender. It was still mirrored properly and I didn't see any missplacement of vertices. - I recalculated the outside (Mesh -> normals -> recalculate outside), still no missplacements. - Finally I baked a new sculpt mesh again. Now it comes. I uploaded the texture in SL and applied it on the prim. In the SL edit-tool I unchecked the Mirror button. With my old sculpty texture I had to check this Mirror button in-world. The Inverse button is also unchecked, never touched that. But: the sculpt was mirrored properly in-world, but now it was inside-out. The Inverse button solved it, but that is not the solution. So in Photoshop I flipped the texture horizontally and uploaded a new sculpt texture again. The sculpt is now mirrored properly and isn't inside-out. Mirror and Inverse button are both unchecked. But, as you can see on the picture, the sculpt isn't as smooth as the original. 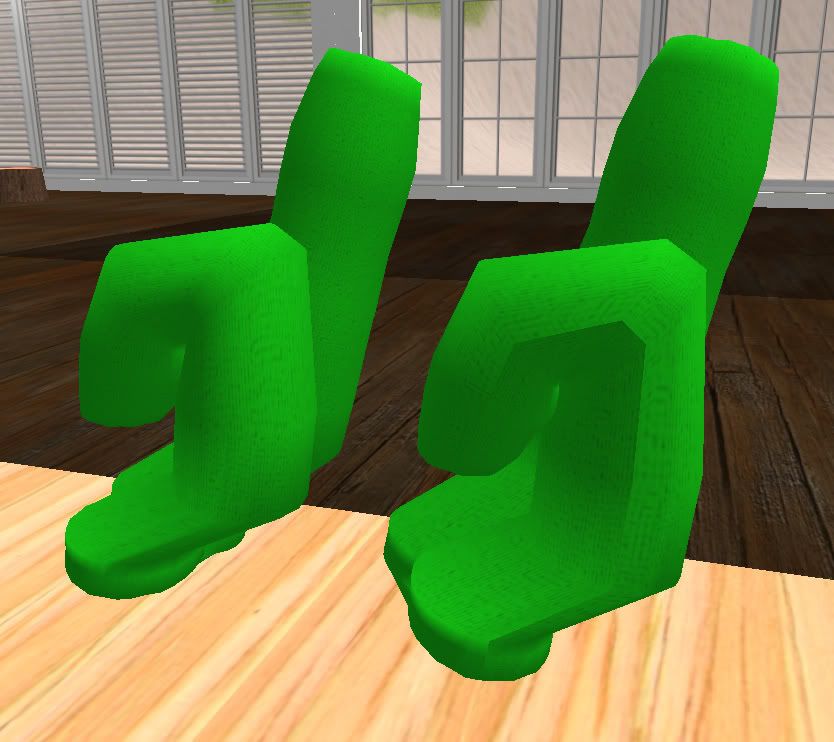 On the left you see the original sculpt, but with the in-world SL Mirror-button checked. On the right is the new sculpt with all buttons unchecked. You can clearly see the sharp line on the right sculpt. I got the same effect with mirroring the sculpt by changing the red color channel in Photoshop. So both methods work, but absolutely not perfect. |
|
Gaia Clary
mesh weaver
Join date: 30 May 2007
Posts: 884
|
03-01-2009 13:58
Hi, Paulo;
I made a rough test and i can not verify your results:  the green sculptie is with the "original sculptmap". the red sculptie has got the insideout-map and the "insideout" button checked, so that you can see, that they both are indeed identical. I also checked to put both sculpties at the same location and they fit perfectly. When i uncheck the insideout button while both sculpties are at the same location. And now the inner side of them gets texturised as expected. So no derivation from the expectations anywhere... How i did it? in blender: - made the original sculptie. - exported the sculptmap as "original.tga" - in the uv-editor selected all vertices. - mirror the sculptmap along the x-axis (s x -1) - bake the sculptie again. - export that as "insideout.tga" import both maps to secnd life and apply. you can take a look at the sculpties in world: http://slurl.com/secondlife/Research%20Center/169/74/25 There you also find the 2 "mirrored" sculpties, where i have mirrored in the 3D viewer along the y-axis. I also colorised the sculptie with "insideout" button checked in red. And again i do not see any unexpected derivations... Everything is perfectly mirrored ... There must be something you do differently or i do not understand, what your problem is ... |
|
Paulo Dielli
Symfurny Furniture
Join date: 19 Jan 2007
Posts: 780
|
03-01-2009 15:09
Yes, I must do something differently for sure. Your test proves that clearly. Is it maybe the building process before?
My sculpty building 'project' started with making a sculpty from scratch, using a sculpt cylinder that was generated by the Domino scripts on your website. I then built the first sculpty shape and a few others from scratch (they are supposed to be fingers lol). So far so good. When I imported these first sculpties everything was okay and nothing needed to be changed in Photoshop or Blender itself. Then I wanted to make a second set, using the already made sculpties as original meshes. Here is where the problem started. Some meshes had to be mirrored. I mirrored them in Blender's Object mode. Later I read that it's beter to mirror them in Edit mode (they said that the UV map gets mirrored too), but I also read that it makes no difference. Anyway, after mirroring these original sculpts, changing them into new shapes and baking the textures, I had to mirror the sculpty prims in SL itself. So maybe in this initial process I did something wrong? Another thing might be that I have never used the UV-editor itself to mirror the sculptmap. I mean: in Blender I've only mirrored the object itself (ctrl M). Later I did what you said: reimport the tga (and mirror the mesh in edit-mode), recalculate the outside, bake again. But then the result was that the sculpty in SL was inside out with missplacements. So I certainly am doing something wrong here. The question only is: what? Gaia, I already want to thank you for your wonderful help to all sculpty creators and in this case also to me. Sorry for my bad English (not my native language). It is a bit hard to explain what I exactly mean. |
|
Gaia Clary
mesh weaver
Join date: 30 May 2007
Posts: 884
|
03-01-2009 15:43
My sculpty building 'project' started with making a sculpty from scratch, using a sculpt cylinder that was generated by the Domino scripts on your website. I then built the first sculpty shape and a few others from scratch (they are supposed to be fingers lol). So far so good. When I imported these first sculpties everything was okay and nothing needed to be changed in Photoshop or Blender itself. Then I wanted to make a second set, using the already made sculpties as original meshes. Here is where the problem started. Some meshes had to be mirrored. I mirrored them in Blender's Object mode. Later I read that it's beter to mirror them in Edit mode (they said that the UV map gets mirrored too), but I also read that it makes no difference. Anyway, after mirroring these original sculpts, changing them into new shapes and baking the textures, I had to mirror the sculpty prims in SL itself. - If you mirror in object mode, the sculpt map will not be affected at all. - If you mirror in editmode: .... if you mirror along one axis, or along 3 axes, your sculptie gets inside/out. .... If you mirror along 2 axes, the insideout effect does not occur. Behind the scenes: The problem is, that only one side of a sculptie is rendered. the other side is invisible. When you mirror along 1 or 3 axes, the face normals turn around and what originaly was the outside of the sculptie now becomes the inside... Now you should be able to "Mesh -> Normals -> Recalculate Outside" then go to object mode and rebake your sculptie. the insideout effect should be gone in most cases. The problem is that the "recalculate Outside" needs to determine the "outside" of your sculptie somehow. And blender might think, the outside of your sculptie is something else than you think... So if your sculptie still renders as inside out, try to "recalculate inside" and rebake. You have the option to make the normals visible. (editmode, F9, mesh tools, draw normals, make NSize > 0.4 to see immediately what goes on) Think the blue lines as light rays. if you follow a light ray towards the sculptie surface and you end at the outside of the sculptie, everything is ok. If you end onm the inside, try either "mesh normals recalculate outside" or "mesh normals recalculate inside" one of them works. Finally, if you dislike the normals rendering at all, or your find normal calculations are not your thing, then go to the UV-editor, flip the uvmap horizintally, rebake your sculptie and get happy... So I certainly am doing something wrong here. The question only is: what? Believe it or not, but i meanwhile can place any sculptie vertex at any place it can be according to the theory. And i can be 100% sure, that my sculptie looks inworld excatly like what i can predict from its representation in blender... Gaia, I already want to thank you for your wonderful help to all sculpty creators and in this case also to me. Sorry for my bad English (not my native language). It is a bit hard to explain what I exactly mean. And as long as i can find the time to help, i am happy giving away what i know. Of course hoping to get back something at some time in the far future... Maybe i should open a Sculptie consulting shop... (just kidding I hope, you can get along with your insideout thing. I might create a tutorial at sometime, but currently i virtually have no time, since i am busy with my own in world creations right now ))have fun |
|
Paulo Dielli
Symfurny Furniture
Join date: 19 Jan 2007
Posts: 780
|
03-01-2009 17:29
But i definitely trust blender and Domino's scripts, which are close to perfect regarding precision. ) Look at what I have up till now: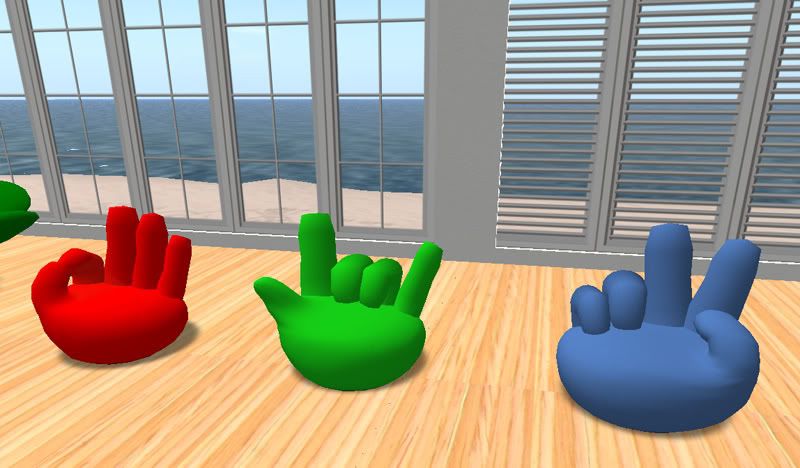 The main problem was LOD with these big corners and bends. Your video LOD tuts made me go back to Blender again. Through your tutorials I was able to position the vertices, so that the LOD is now minimal, almost none. In this process I had to mirror some fingers, and later discovered that it only looks good in the latest regular viewer. Hehe, so far my Blender 'history'... Right now I am building my fourth chair in Blender, using the 'old' mirroring technique which I have done the last week. The suggestions in your last posting look very promising, especially the alternatives 'recalculating inside', looking at normals and just flipping the UV. I will try them all and will post my results here later for other users. But I wanted to let you know how much I appreciate your videos and help on these forums, and that you certainly deserve ALL KUDOS for helping so many people out! Thanks again! |