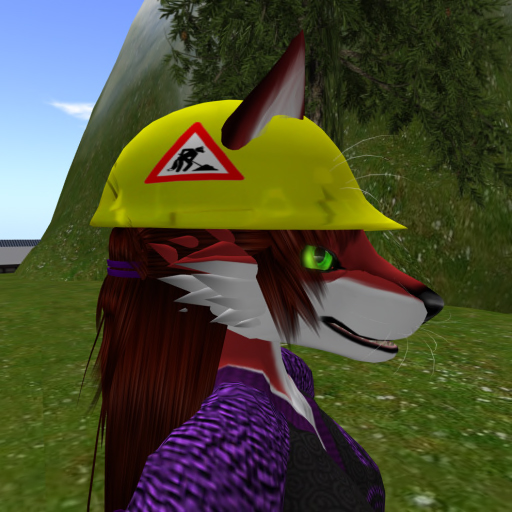
Gaia, I've been working my way through your Blender tutorials on the machinimatrix site, and have just completed the one on texturing the hard hat. My Avatar in-world now has a cute little yellow hard hat, with the Fox and Ground logo on the sides. Great stuff!
But I ran into a few oddities that I hope you can explain. I realize that later tutorials may cover some of this, like how to make sculpties that are relatively immune to LOD oddness. But these points did bug me.
In the previous tutorial, on shaping the hard hat itself, I was following along step by step, and was tweaking the shape of the hard hat to match the background image just fine. But when trying to do the brim, I guess I hit page up or page down one time too many while trying to change the radius of effect, and suddenly I lost the ability to drag out only the highlighted points and the connected falloff. Instead, from that moment on, no matter how few points I had highlighted, grabbing and dragging moved the whole prim. I couldn't use page up or page down to affect it any more. I ended up scrapping the entire session, quitting and restarting Blender, and doing the exercise all over again from step one. Any idea what happened, and how to fix it when it does?
The hard hat itself, when completed and brought in-world, only shows a low LOD. Like the multirez LOD 1 view? Stable, but not very well shaped. Looked more like a soft cloth slouch hat than a hard hat. I noticed that your example in the machinema did the same. Why? Is there a way to improve the sculpty resolution?
In making the UV-mapped texture for the hard hat, I got that to work OK for making a 512 x 512 texture to apply to the sculpty. But the resolution wasn't good enough to show my logo very well on the hat. When I tried to make a 1024 x 1024 version of the texture, it did some sort of strange 2x repetition of the texture, instead of making a high-rez version. I could see the inside of the hard hat in 2 places, and the two logos from the sides were there 4 times instead of two. What happened? And is there a way to bake a 1024 x 1024 texture that works?
Welcome to the Second Life Forums Archive
These forums are CLOSED. Please visit the new forums HERE
Some Blender Q's for Gaia |
|
|
Ceera Murakami
Texture Artist / Builder

Join date: 9 Sep 2005
Posts: 7,750
|
01-06-2010 07:00
_____________________
Sorry, LL won't let me tell you where I sell my textures and where I offer my services as a sim builder. Ask me in-world.
|
|
Gaia Clary
mesh weaver

Join date: 30 May 2007
Posts: 884
|
01-06-2010 08:20
I assume strongly that you refer to the NEW "sculpted prims" tutorial as you mention the "brim" in your post. Although we used a "hard hat" in our old tutorials and a "top jat" in the new one. Am i correct ? If not, maybe my explanations below do not make too much sense...
But when trying to do the brim, I guess I hit page up or page down one time too many while trying to change the radius of effect, and suddenly I lost the ability to drag out only the highlighted points and the connected falloff. Instead, from that moment on, no matter how few points I had highlighted, grabbing and dragging moved the whole prim. - save my work to a .blend file - close blender and restart it - open recent files -> the just stored .blend file and continue as if nothing bad happened... The hard hat itself, when completed and brought in-world, only shows a low LOD. Like the multirez LOD 1 view? Stable, but not very well shaped. Looked more like a soft cloth slouch hat than a hard hat. I noticed that your example in the machinema did the same. Why? Is there a way to improve the sculpty resolution? In making the UV-mapped texture for the hard hat, I got that to work OK for making a 512 x 512 texture to apply to the sculpty. But the resolution wasn't good enough to show my logo very well on the hat. ") When I tried to make a 1024 x 1024 version of the texture, it did some sort of strange 2x repetition of the texture, instead of making a high-rez version. I could see the inside of the hard hat in 2 places, and the two logos from the sides were there 4 times instead of two. What happened? And is there a way to bake a 1024 x 1024 texture that works? |
|
Ceera Murakami
Texture Artist / Builder
Join date: 9 Sep 2005
Posts: 7,750
|
01-06-2010 09:53
Thanks Gaia,
Hummm. I was following the "Blender Trail" page, and was referring to these two tutorials: http://blog.machinimatrix.org/2008/05/12/blender-sculptie-creation http://blog.machinimatrix.org/2008/05/12/blender-surface-textures My logo has the words "Fox and Ground" along the bottom of the logo art, at a size which, when placed on the side of the helmet and scaled reasonably for the logo, left the text about the same height as the diameter of my avatar's iris in their eye. The text was rather blurry, and had also gotten distorted at one end by the way the UV mesh shifted. No doubt I can make it better once I learn more, and in cases where I am more carefully controlling my UV mapping and vertex positions. Haven't yet seen a tutorial with a Top Hat as an example. Oh well, I shall endeavor to be patient as I work my way through the full collection. Thanks again for the wonderful tutorials. I can't count how many times I tried to start learning Blender, and couldn't even get the most simple tasks accomplished. That UI is very strange to someone like me, who is used to Photoship, Autocad, DAZ|Studio and other apps with commercial UI's designed more for ease of use. With your tutorials, I am beginning to scratch the surface and actually make useful sculpties! _____________________
Sorry, LL won't let me tell you where I sell my textures and where I offer my services as a sim builder. Ask me in-world.
|
|
Gaia Clary
mesh weaver
Join date: 30 May 2007
Posts: 884
|
01-06-2010 10:28
First: The top-hat video is here: http://www.vimeo.com/8504087
then: for the texturing problem... Check how many faces are placed where your logo will end (select them). Then go to the UV-editor and watch how much space of the full texture is occupied by the UV-mapped faces (the squares). And then grab your calculator assume, you had lets say an area of 5 times 5 faces used for your logo. assume further your texture is made of 32*32 faces.Now assume further you had used a 512*512 texture. So the width and height of the texture area containing your logo will be: (5/32) * 512. this is an area of 80*80 pixels. This are is stretched and bended so that it fits on the hard-hat... So either your logo is very small and it fits nicely into that space, or not. then it gets blurry. You can however get better results if you use a higher resolution texture. Or you remodell your object in such a way that you get more faces where you want your logo to appear. Then you can create wonderfull textures with high precision where it is needed... As i said, this is the topic of our new texturing tutorial (which currently only exists in theory  ) )Does that help you ? If not, you can send me your blend-file if you like, then i can take a quick look at it. please do not forget to "pack" (for each texture in the uv-editor click on the small "package" icon to pack the image "into" the blend-file) the textures with it. Otherwise i can't see the problem... ummm.... Sorry for doing quick typing today. I am somewhat under pressure to get something done for myself too have fun |
|
Ceera Murakami
Texture Artist / Builder
Join date: 9 Sep 2005
Posts: 7,750
|
01-06-2010 10:37
Hey, no problem. I appreciate the quick replies.
What you say about the mapping makes sense. I had not been considering it so much in terms of how the faces on the intemediat texture would perforce need to be mapped to regular squares in the final texture. Now I can see a number of things I could do if I really wanted to maximize the resolution. Not the least of which would be to ensure my sculpt has more actual verticies and faces in the "graphics critical areas", yes? *smiles* I'll try not to bug you for a few days, while I work through more tutorials. Thanks again. _____________________
Sorry, LL won't let me tell you where I sell my textures and where I offer my services as a sim builder. Ask me in-world.
|
|
Ceera Murakami
Texture Artist / Builder
Join date: 9 Sep 2005
Posts: 7,750
|
01-10-2010 20:27
Second try came out much better. Looking forward to more tutorials. I've seen the top hat and wineglass ones now, as well as reviewing all the Blender Trail ones up to the hard hat texturing tutorial again.
 I got the 1024 x 1024 surface texture to map properly, after installing Blender and Primstar on my Mac system, where I have a much newer copy of Photoshop available. (Now I have Blender and Primstar on both Mac and Win XP). I think my problem in the first try at the high-rez texture was because I made the UV template at 512 x 512, and was trying to do the surface texture at 1024 x 1024. So it tiled in some odd way. I made my own hard hat template image for the background, and to use in making the final surface texture, by photographing a hard hat that I own. Mine had a flat lower edge, rather than one that curves down a bit in back. After modeling the sculpty and making the sculpt map, for some reason in SL it formed as "inside out"? I believe that when I pushed the lower part of the sphere upward into the hat, I barely pushed a few faces through the upper mesh. Was able to correct it in-world with the "Inside Out" checkbox, but that was somewhat odd. I still am seeing a large disconnect between the level of shape detail that I can make in Blender, and what SL shows the sculpty as. It's as if it was worthless to bother modeling at any multirez level above 1, since SL won't show the higher detail? Having just viewed the beta tutorial with the top hat, I suspect that subsurf has something to do with making the sculpts better, but I guess I'll learn about that in a future tutorial? (Re-reading your replies, I guess I'll have to experiment with that "Shift E" concept...) _____________________
Sorry, LL won't let me tell you where I sell my textures and where I offer my services as a sim builder. Ask me in-world.
|
|
Gaia Clary
mesh weaver
Join date: 30 May 2007
Posts: 884
|
01-11-2010 09:25
IN general there is nothing wrong working with multires. In fact there are many situations where i prefer multires over Subsurf. I am not sure though why you seem to get too rough results... Well there are many pitfalls of course, where you can get "unexpected" results. And definitively you can smooth out much of the sculpty roughness when you know how to make the texture. For instance there is one crucial(!) point which i only learned recently, but which makes a lot of a difference to your textures: In the editing button panel (F9) ensure, that you have enabled [Set smooth] under "Link and Materials". this directly affects how your texture is baked! In the tutorial we advice to add a subsurf modifier with 3 or 4 levels of subdivide to get smooth textures. But with "set smooth" it is almost good without this additional time consuming modifier... And there is much much much more to learn about texturing. Currently i feel like an absolute beginner, while i am diving into that theme
|
|
Johan Laurasia
Fully Rezzed

Join date: 31 Oct 2006
Posts: 1,394
|
01-11-2010 19:45
IN general there is nothing wrong working with multires. In fact there are many situations where i prefer multires over Subsurf. I am not sure though why you seem to get too rough results... Well there are many pitfalls of course, where you can get "unexpected" results. And definitively you can smooth out much of the sculpty roughness when you know how to make the texture. For instance there is one crucial(!) point which i only learned recently, but which makes a lot of a difference to your textures: In the editing button panel (F9) ensure, that you have enabled [Set smooth] under "Link and Materials". this directly affects how your texture is baked! In the tutorial we advice to add a subsurf modifier with 3 or 4 levels of subdivide to get smooth textures. But with "set smooth" it is almost good without this additional time consuming modifier... And there is much much much more to learn about texturing. Currently i feel like an absolute beginner, while i am diving into that theme Right, without set smooth, the object is more 'boxy' and that affects the lighting on the object, hence, how the lighting will bake onto the texture. |