Edit: I just opened up my store here. Drop by if you like. C: http://slurl.com/secondlife/Dernier%20Cri/109/139/28
Note: This is an extreme beginners tutorial (simplified) that outlines the very basics. There's a lot more that goes into skin making than what I outlined here.
Here's the original post:
I had this random inspiration to make a skinning tutorial the other day, and since a lot of people ask about skin making I decided to make one specifically for SL. ")
For this skin I used the 3d.sk (pay site for human photo references) model "Mike", since his face is perfectly suited for a SL skin.
3d.sk is an extremely extremely useful site for anyone making skins, or clothing textures, but sadly it costs money, and if you're a beginner you probably don’t want to pony up the 25 usd for some pictures. If you have a digital camera you can take photos of your friends with some good lighting. That'll probably work just as well.
Anyways I used this same model for my mens skins, so it'll look familiar. I actually think I did a better job on this tutorial skin than the one I made a year ago in my store.
I took tons of snapshots since pictures explain a lot more than words, and wrote comments about each of the pictures.
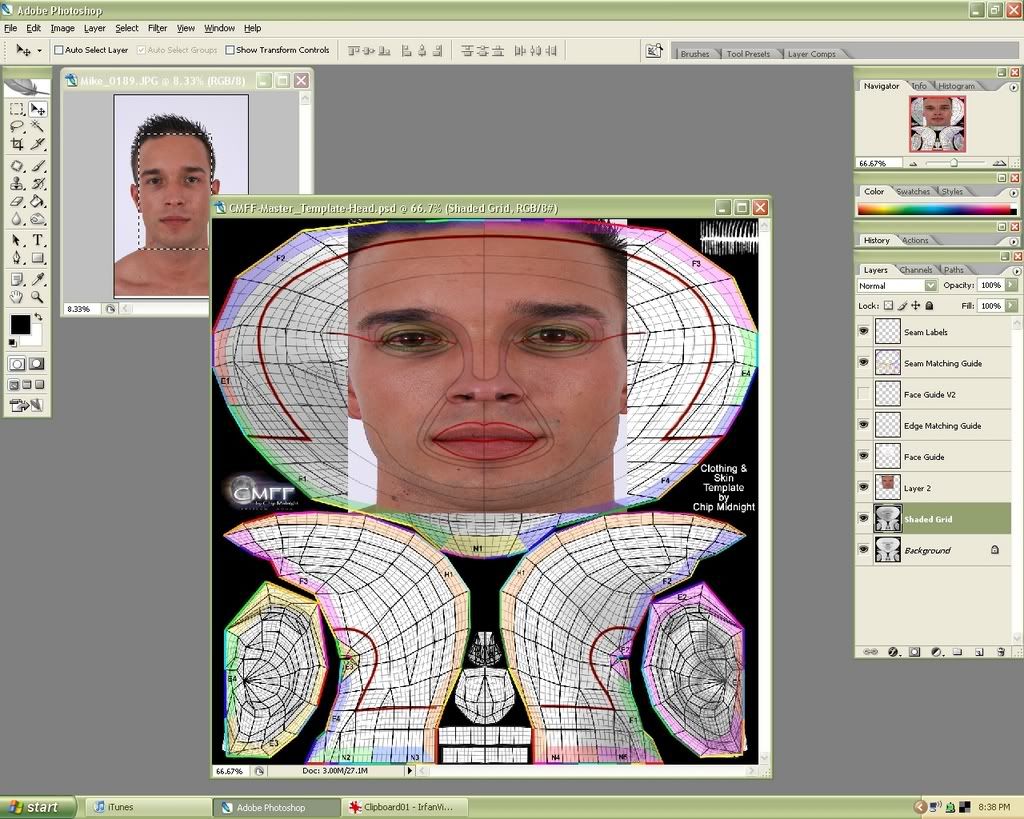
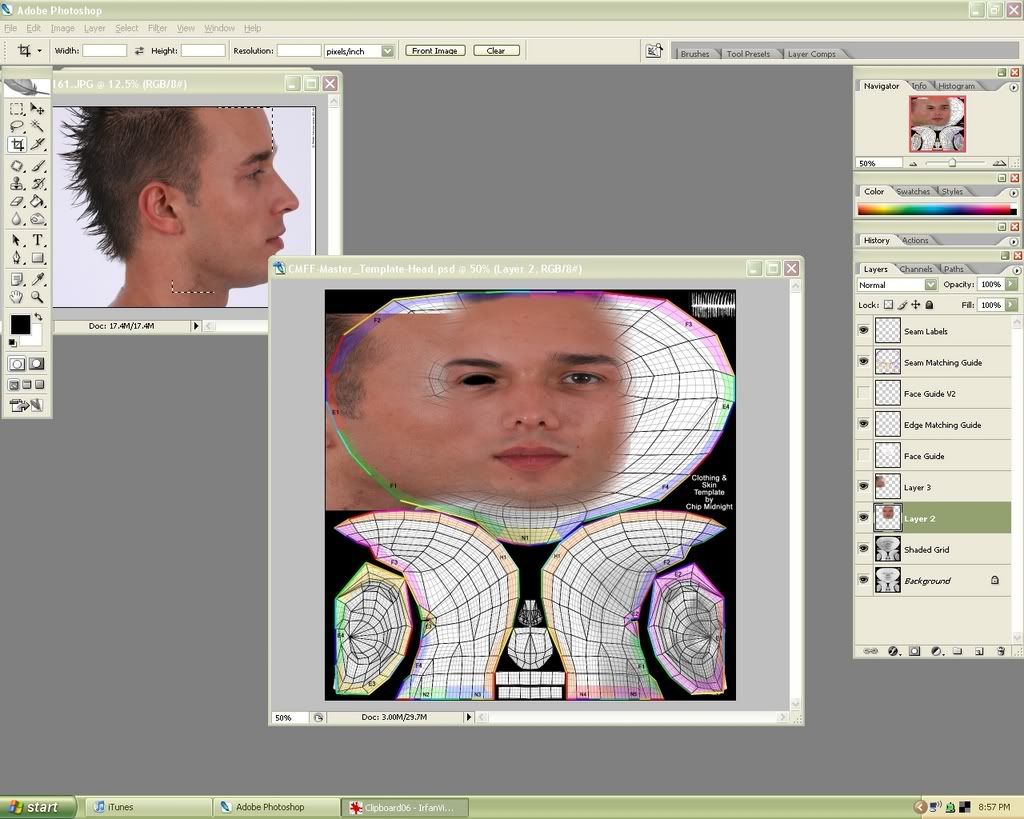
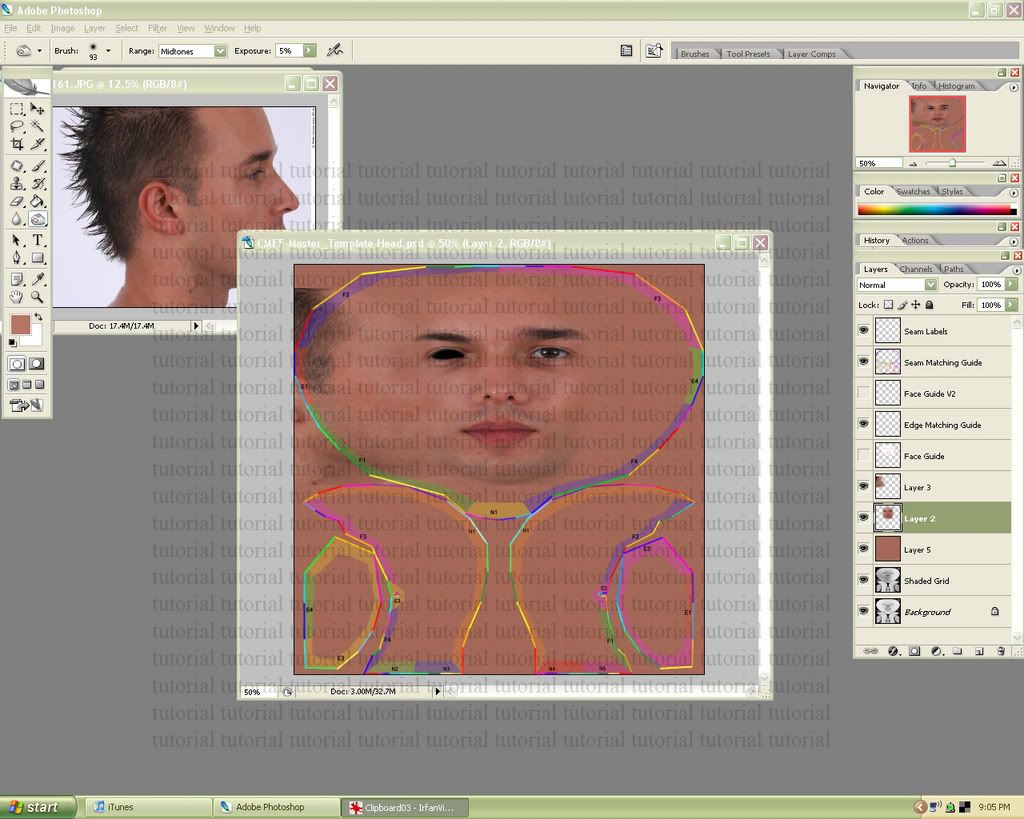
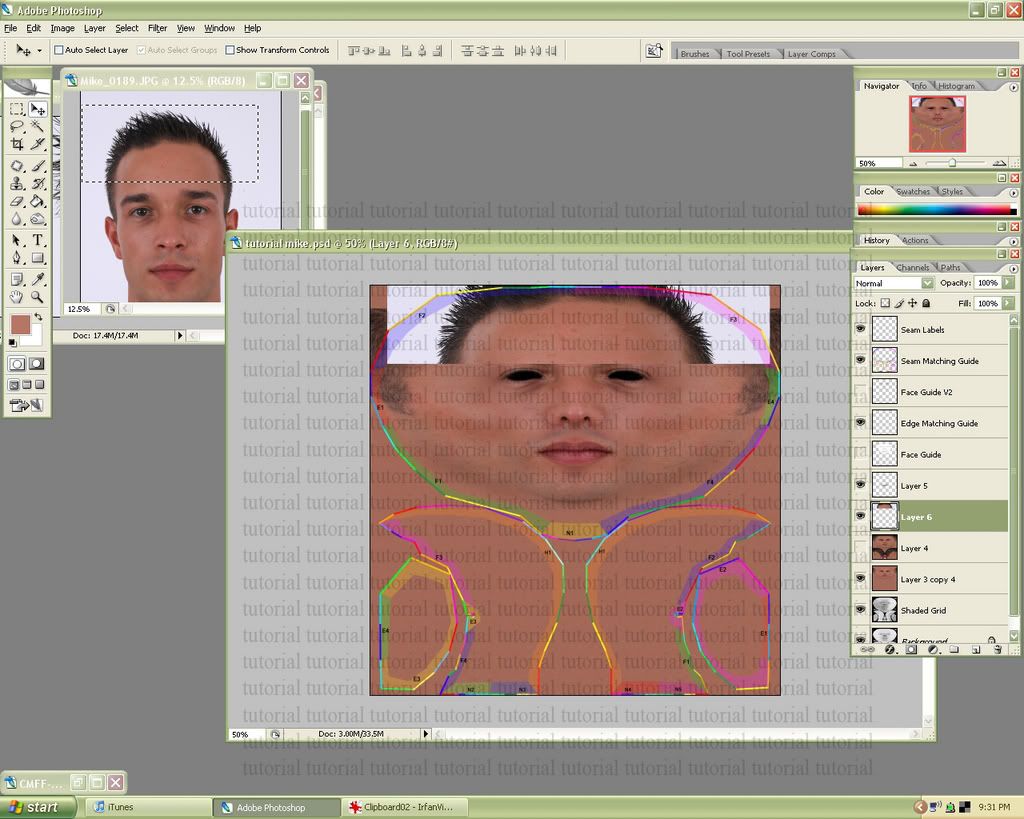
1. Front view photo: Select a section of the photograph and drag it onto the template. Make sure the ‘face guide’ layer is above the picture. Then transform (edit-transform-free transform) the picture the best you can, so that it’s somewhat aligned with the guide.

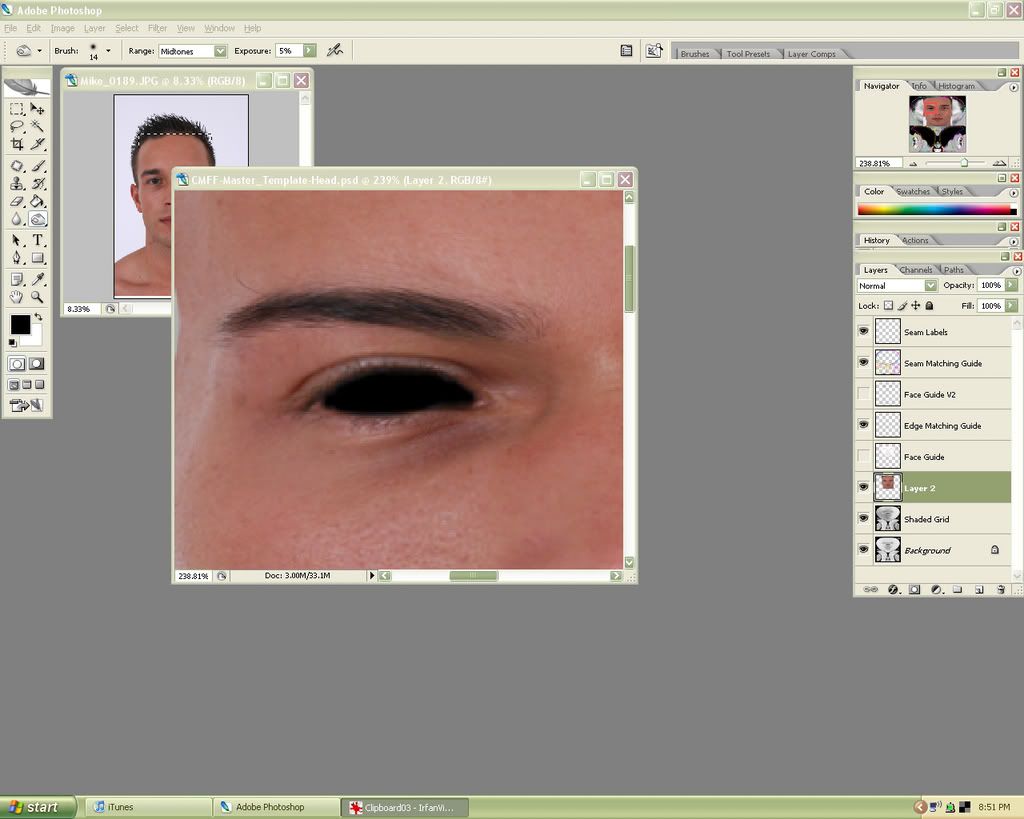
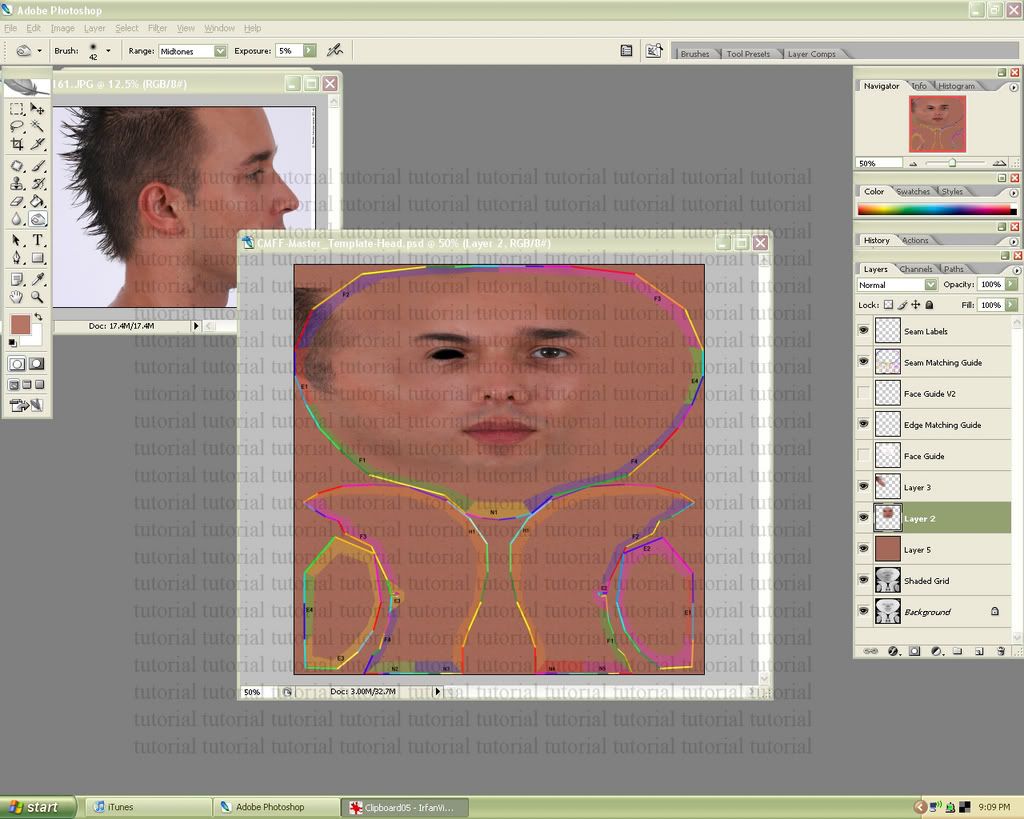
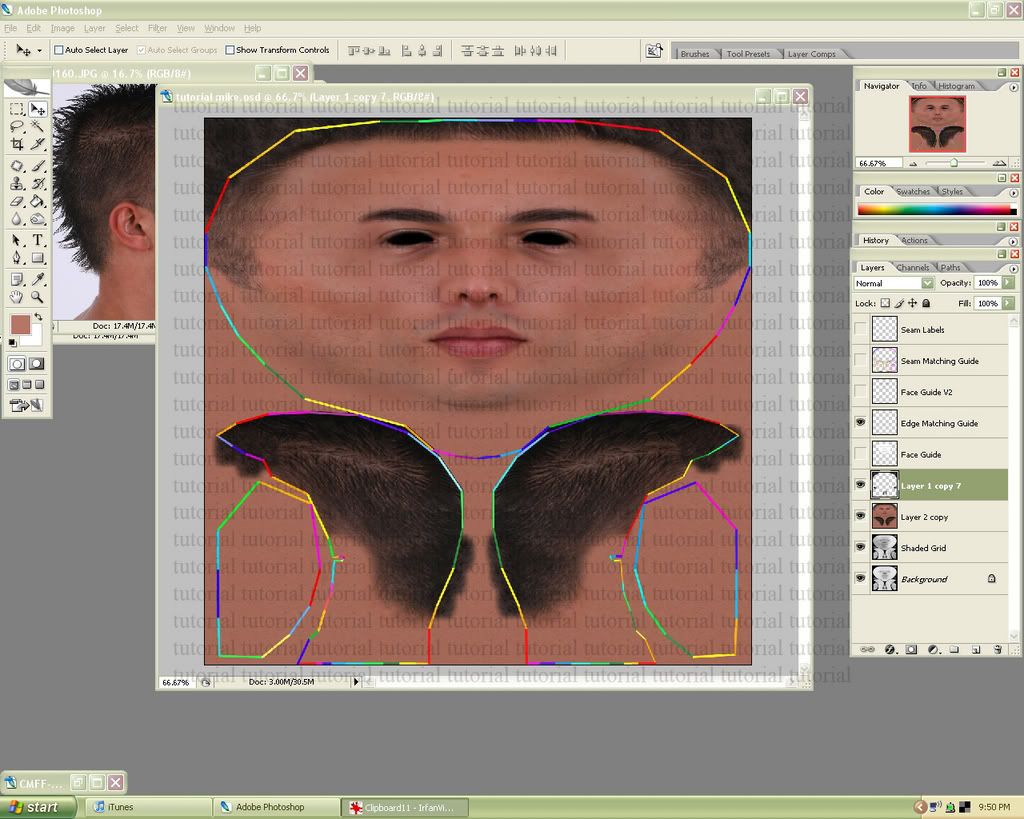
2. Use the liquify filter (filter-liquify…) to further align the photograph to the template. The best way to do this is to set the face guide layer as the backdrop, in front, at a low opacity such as 38 (bottom right in picture). Another good thing to do is mask (red part in pic) the areas you are finished working so that you don’t accidentally ruin them as you work on another section. (ex: covered the finished eye when working on the eye brows) Be really careful on this part otherwise your face will end up a little demented. After completing this stage upload your picture in game (best in the beta grid) and make sure there are no problems. If there are keep liquifying until you’re satisfied with how it turns out. (I also only do one of the eyes because I like to duplicate it later and make them perfectly symmetrical.)
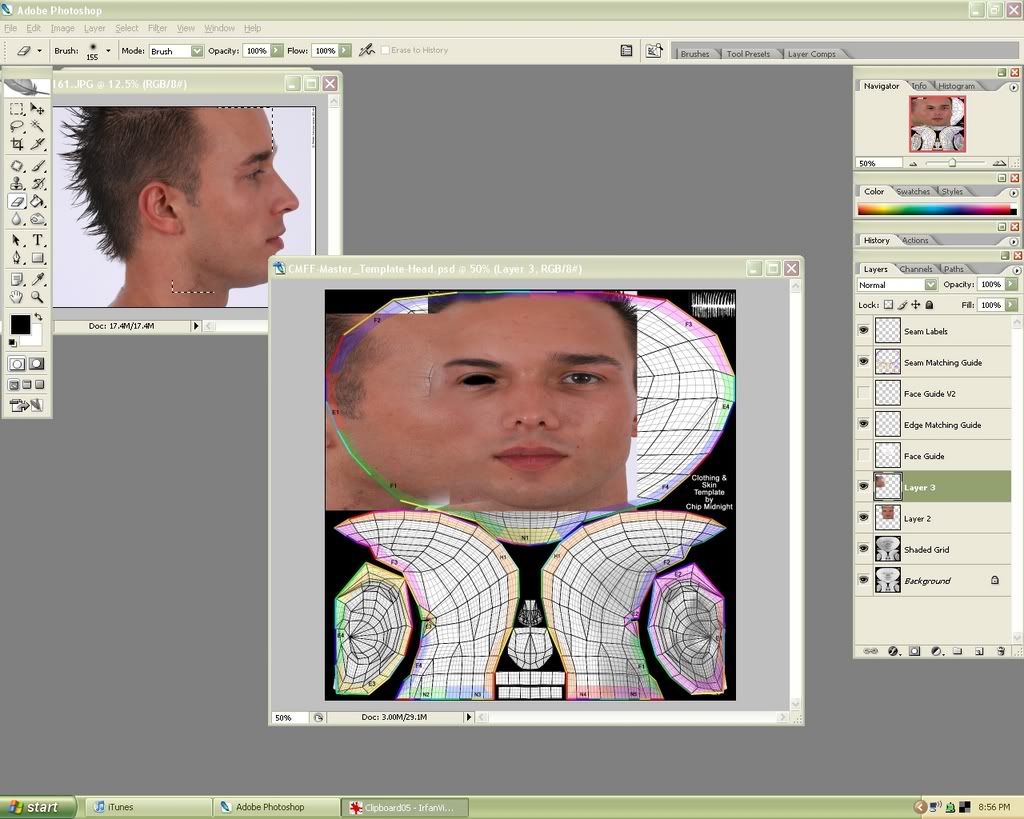
3. Another thing I like to do with the eyes is color them in black. (old Sims 2 habit ) Anyways, it cleans up some of the mess in the eye area and gives your avatar a small dark rim around the eye that looks natural.
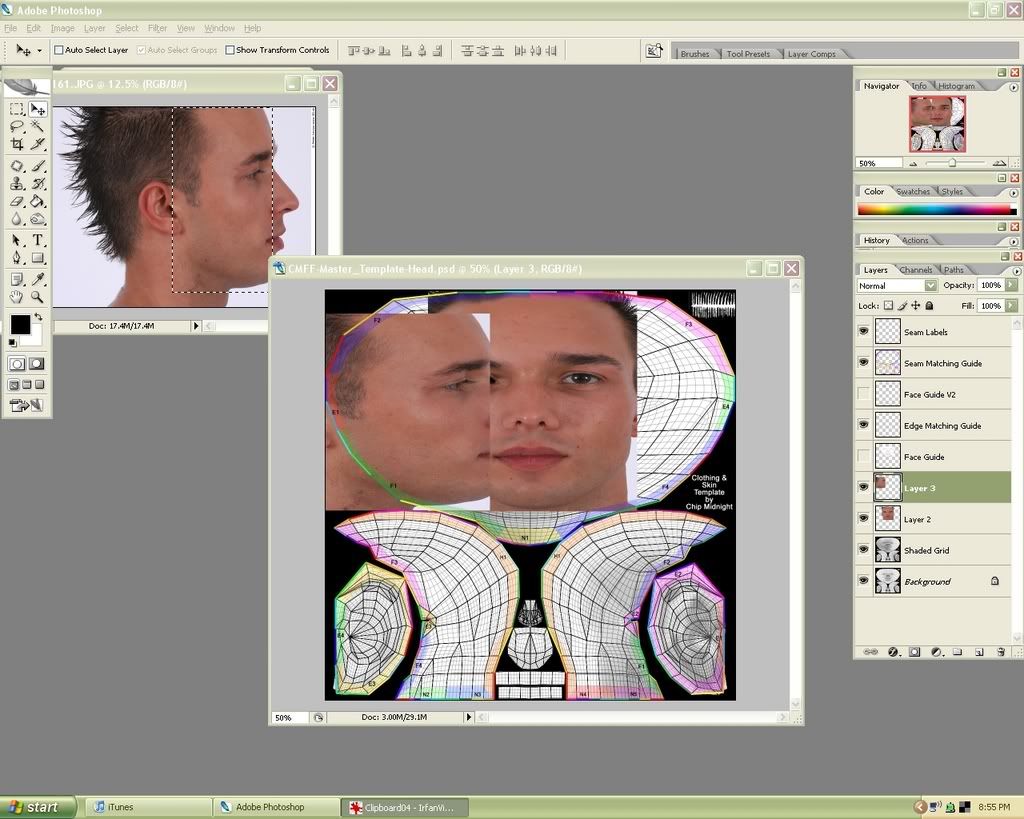
4. Side view photo: (same as step 1) Grab a section of this photo and drag/transform/line it up on the template.
5. Use a soft eraser (eraser with zero hardness, 100% opacity and large size) to erase away some of the hard lines.
6. Do the same to your front view photo.
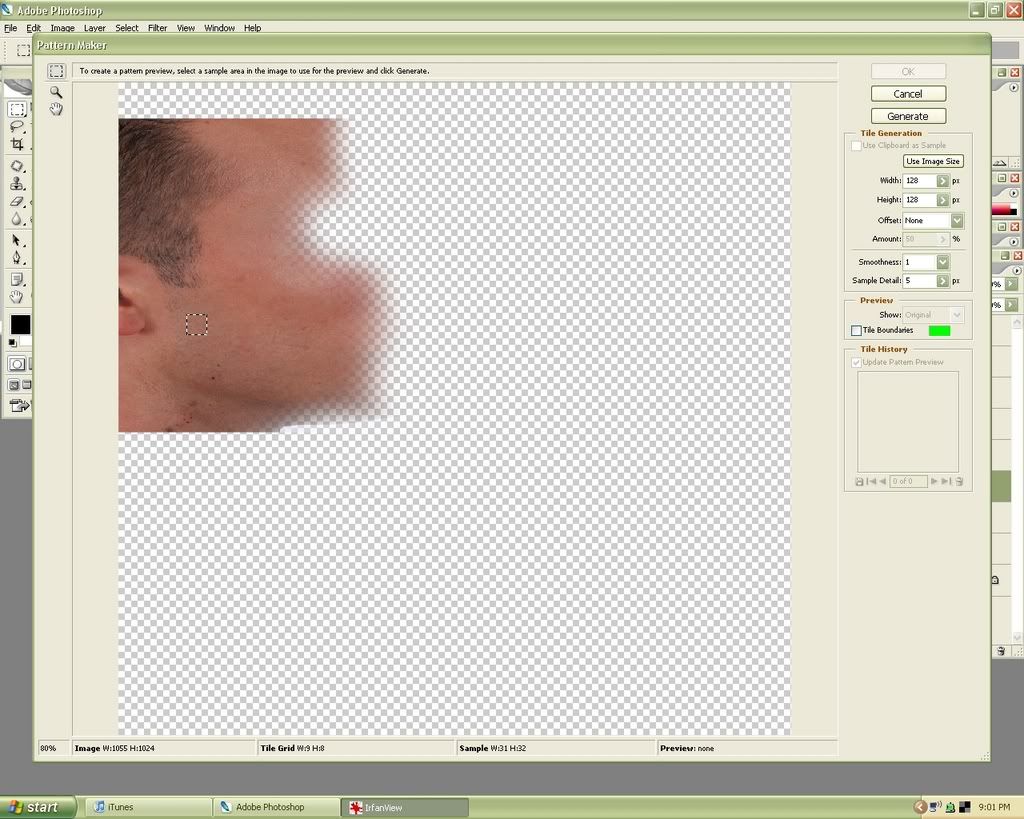
7. Duplicate one of your face layers and open up the pattern maker filter (filter-pattern maker…). Then select a small evenly textured section of the photo.
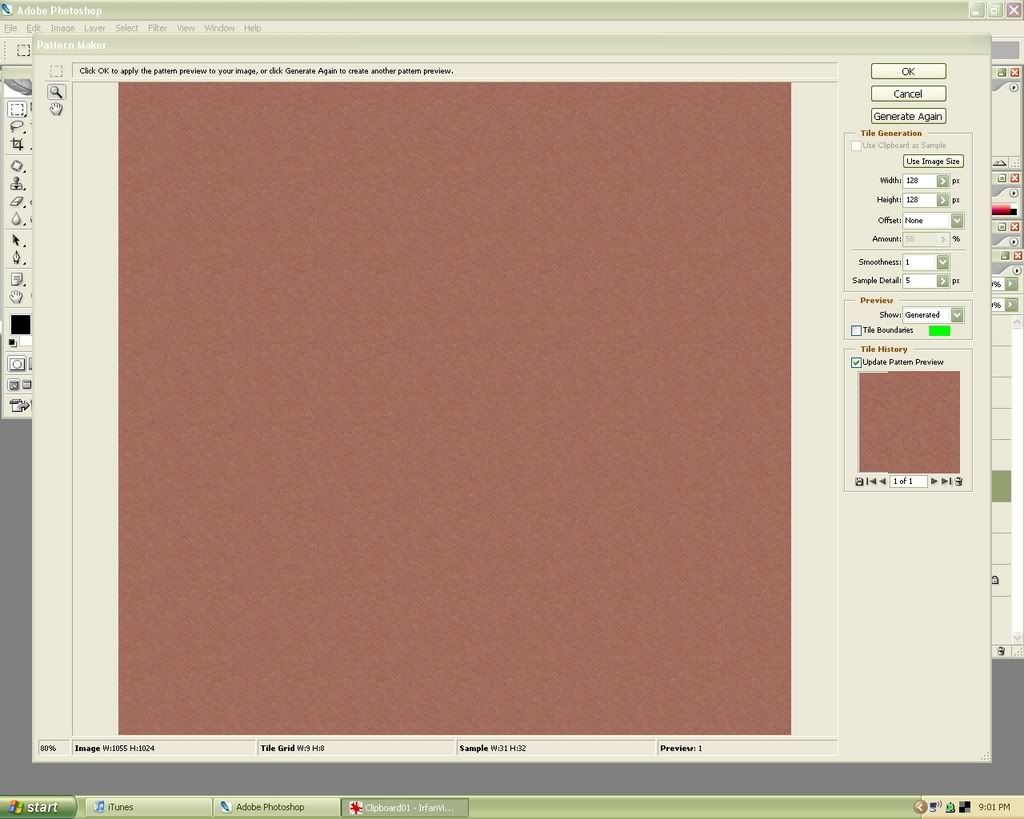
8. Click ‘Generate’. This will be used in the background of the skin. I think it’s a nicer option than just using the grain filter. Note: sometimes your pattern will look really messed up and lumpy. Just keep picking other sections of the picture and try generating them. If you can’t get it right or don’t like this method, you can make a tan layer and use the grain filter on it.
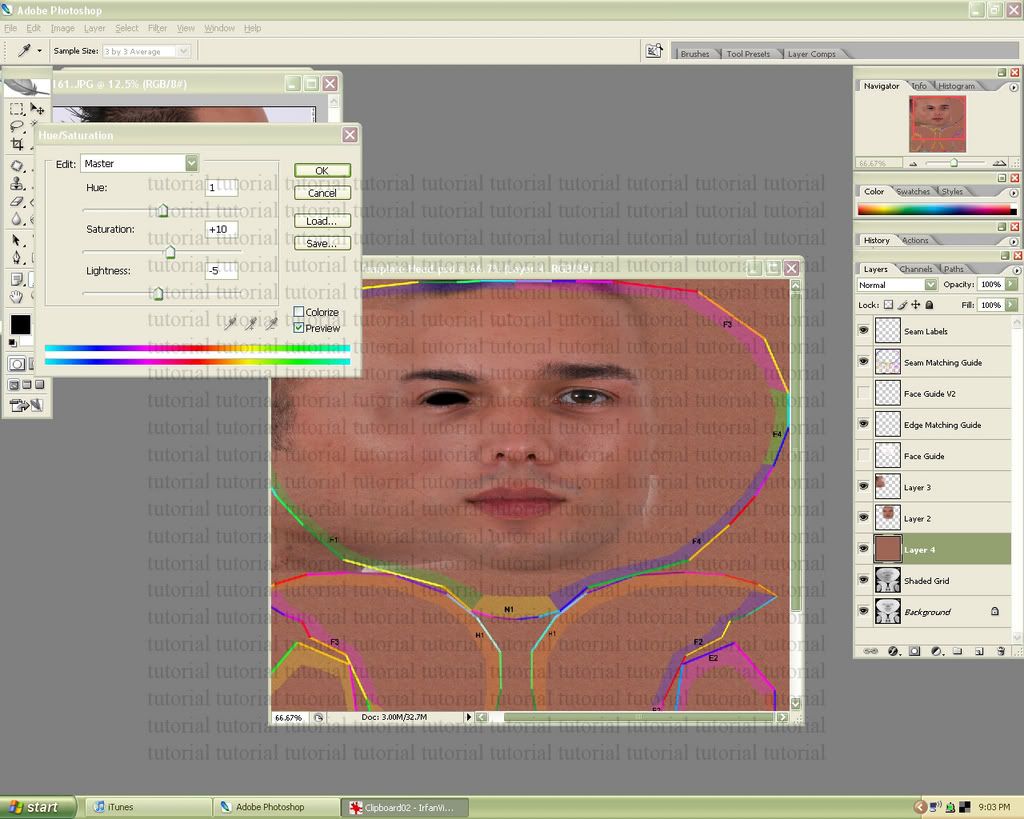
9. You might have to edit the hue/saturation a little so that it matches with the rest of your image. (image- adjustments -hue/saturation) Sorry for the ugly tutorial text everywhere. There are too many bums that will take the textures out this tutorial and try to sell them, instead of actually reading and learning how to make things themselves. (Not fool proof but it will ward off the laziest ones.)
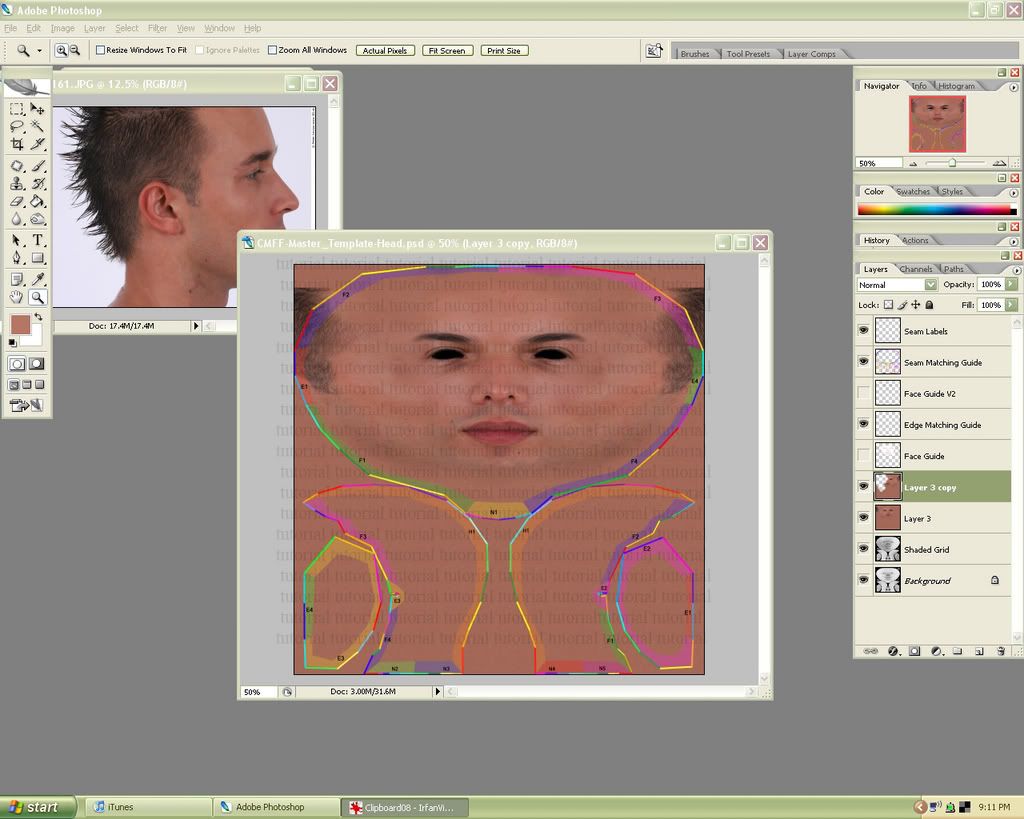
10. Erase more of the harsh outlines/any un-needed garbage from the photograph with a soft brush.

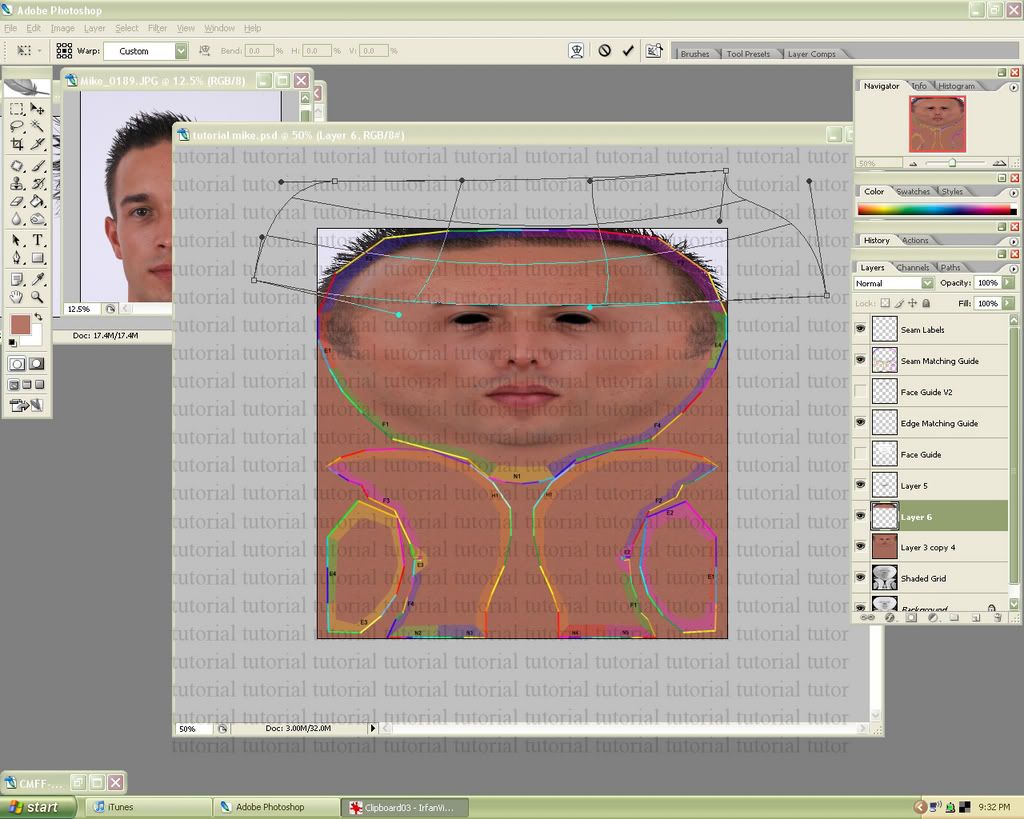
11. Use the warp tool (edit-transform-warp) to curve the jaw line correctly on the template. Warp as many times as you need to.
12. Use the eraser tool to remove any harsh lines (like step 5) or pieces that are too close to the edge matching guide.

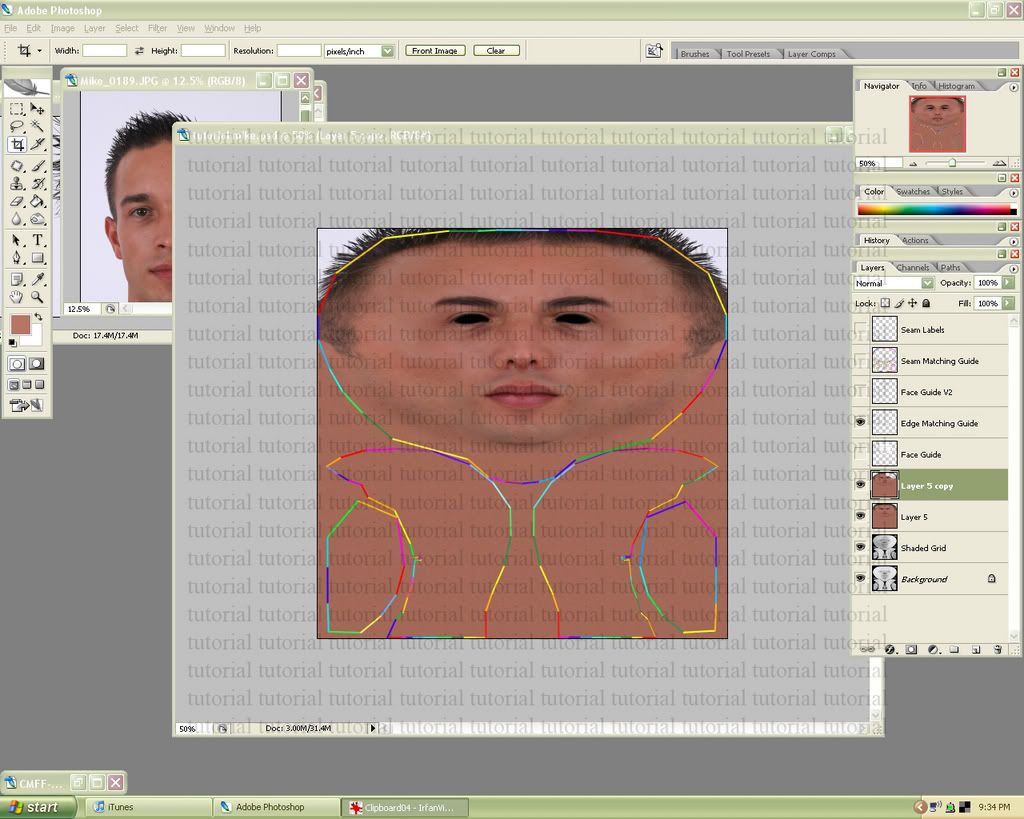
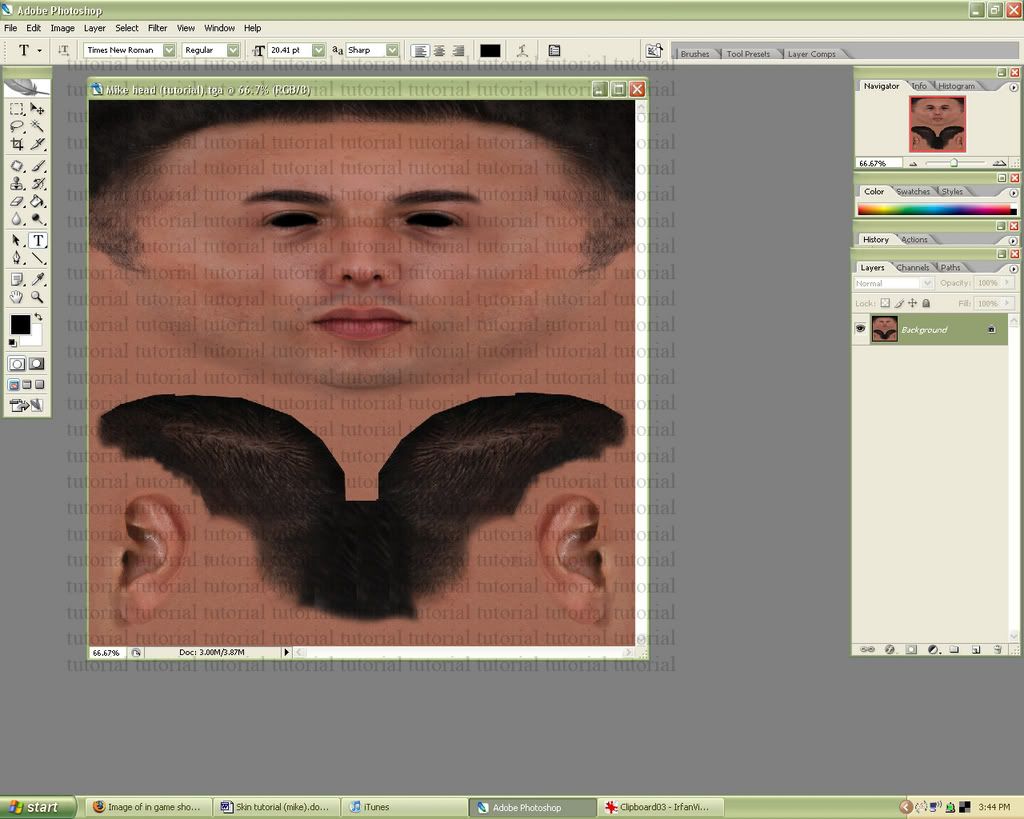
13. Merge all of your photo layers, and then duplicate the resulting layer. (We’re going to make the texture somewhat symmetrical) We’ll need to crop the entire layer to remove any unseen pieces outside the border. First select the entire image. (ctrl-a) Then go to image-crop. After that flip the image horizontally. (edit-transform-flip horizontally) (without cropping, your image would not have flipped over the center)
14. Now erase away the unfinished sections, leaving holes where the texture underneath is finished. After that you can merge the two layers back together.
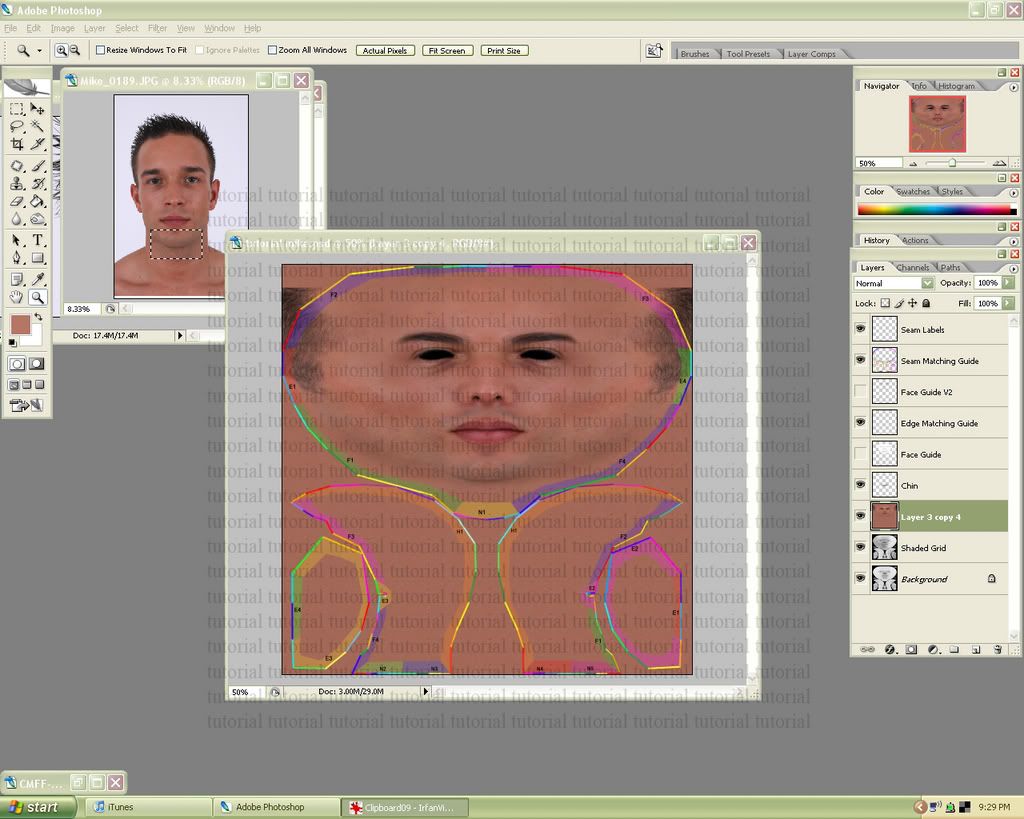
15. At this point you can start touching up the texture how you like. I added some shine to the lips, darkened the eyes/ changed the shape a little, and did other small touch ups. Girl skins tend to take forever at this stage. (Removing blemishes, re-shading, adding highlights/shadows, changing skin rosy-ness, etc.) Thankfully this model doesn’t require too much re-working, and looks fine as is.
16. Front view photo: Go back to this photo and pull over/resize a forehead section with the hair line in it. We’ll be working on the hair
17. Just like in step 10, use the warp tool to fit the hairline to the template.
18. If you like how one side is turning out better, use the horizontal flip method (as in step 13) to make both sides the same.
19. Side view photo: Select the hairline and drag it over to the template/resize.
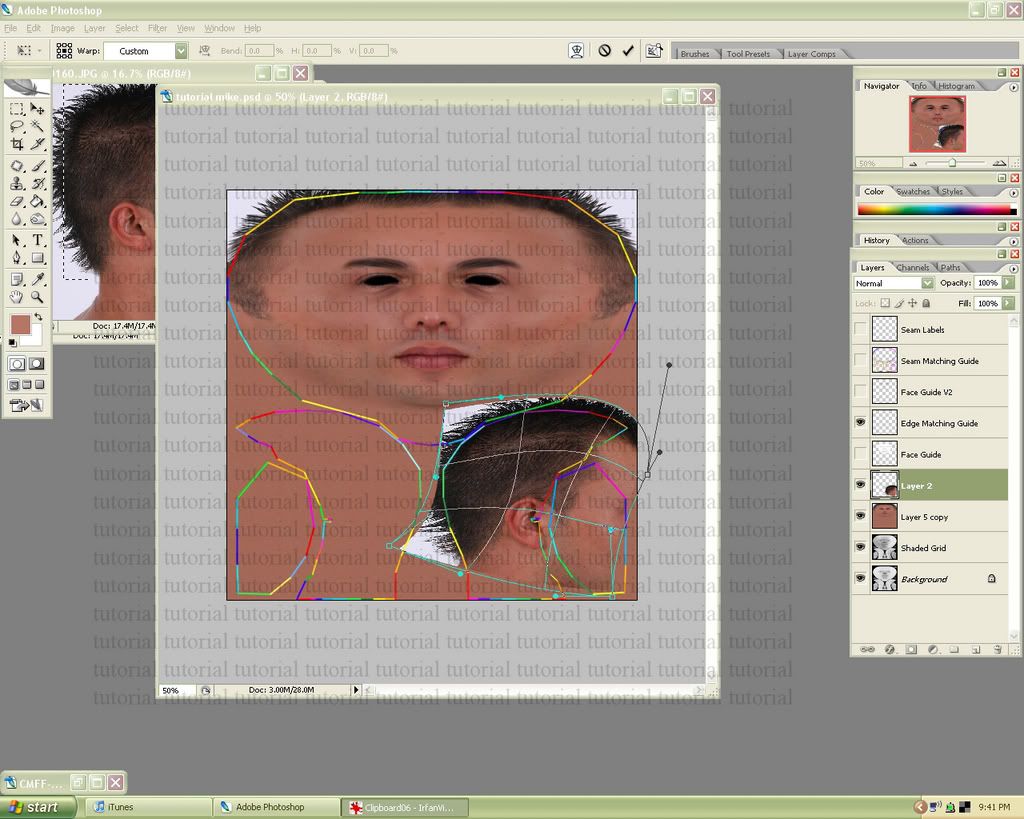
20. Use the warp tool again to fit the photo.
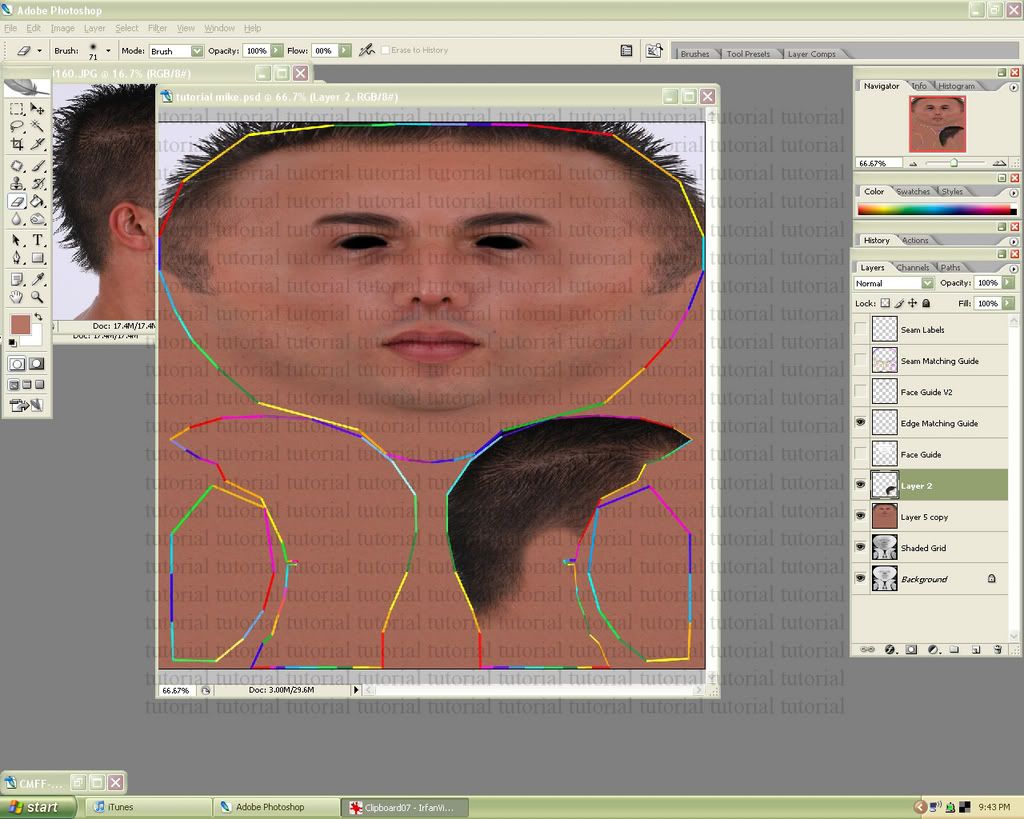
21. Erase any unnecessary parts of the picture, including the section where the ear will be.
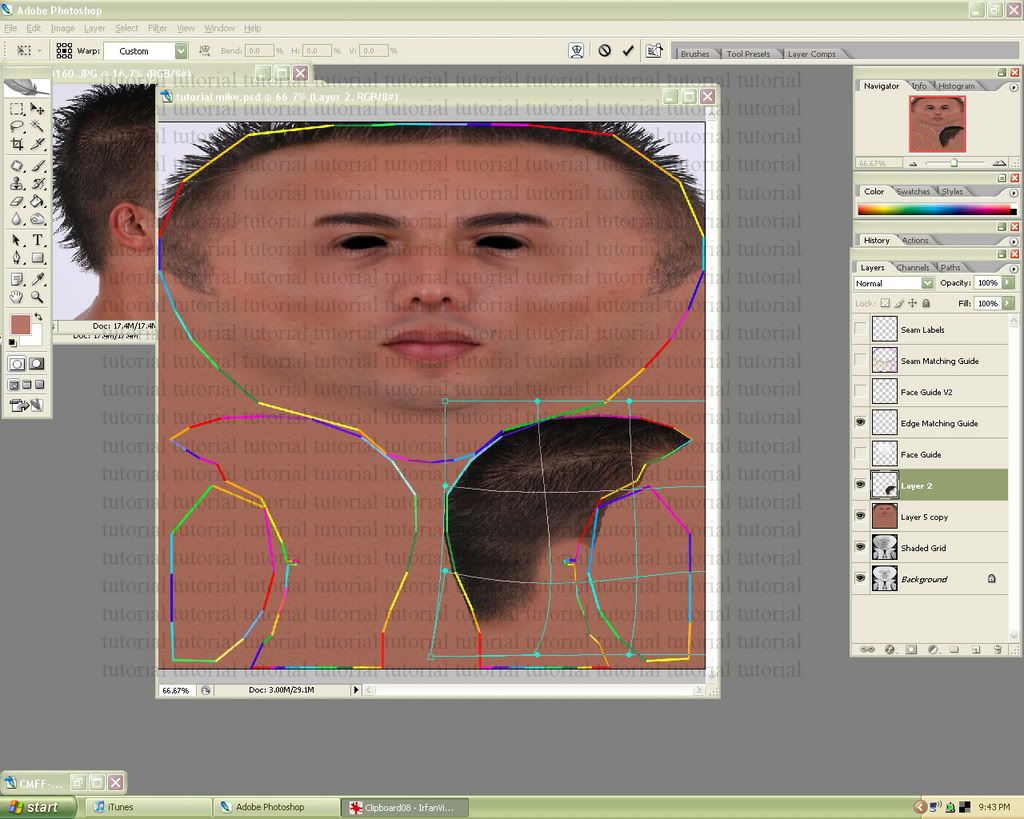
22. You might have to warp again if you find that some parts need fine tuning. Once you get that right you can duplicate the results on the other side of the texture.
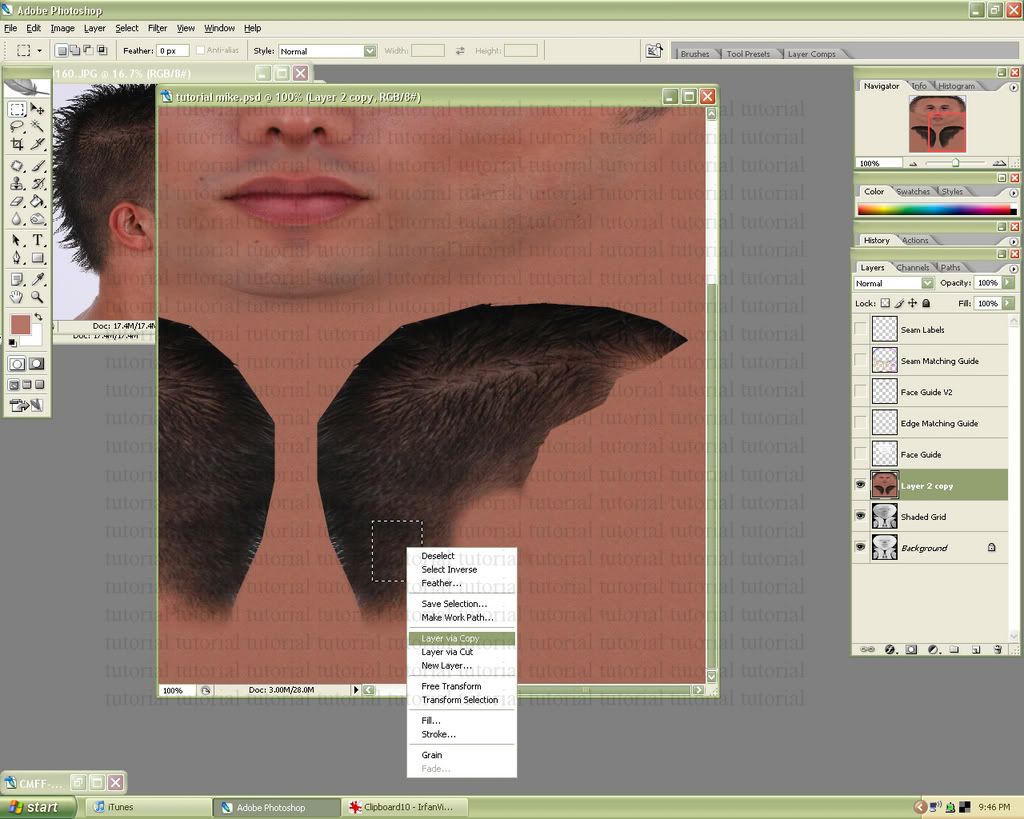
23. Next we’re going to clean up the seams a little. Find a solid patch of hair, select it, then right click and copy it.
24. Use a soft eraser to remove the harsh square edges of the patch. Then duplicate the section (alt drag) over any parts that look faded or missing. Once you’re done merge all the hair patches back together.
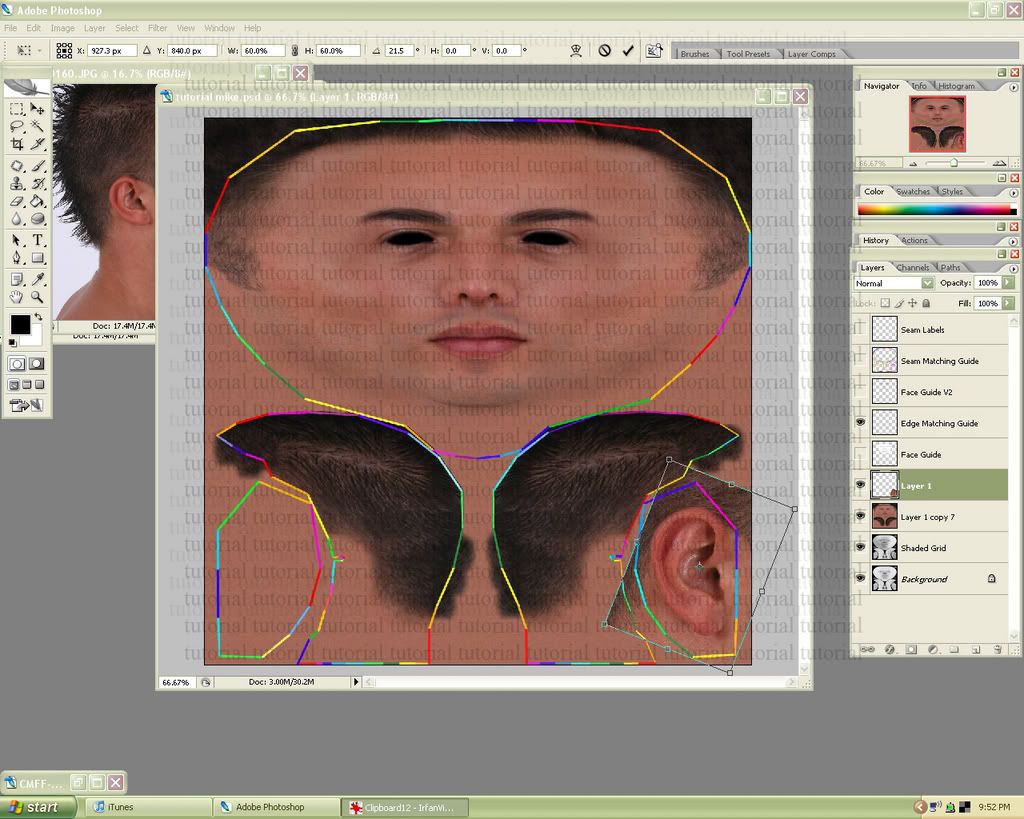
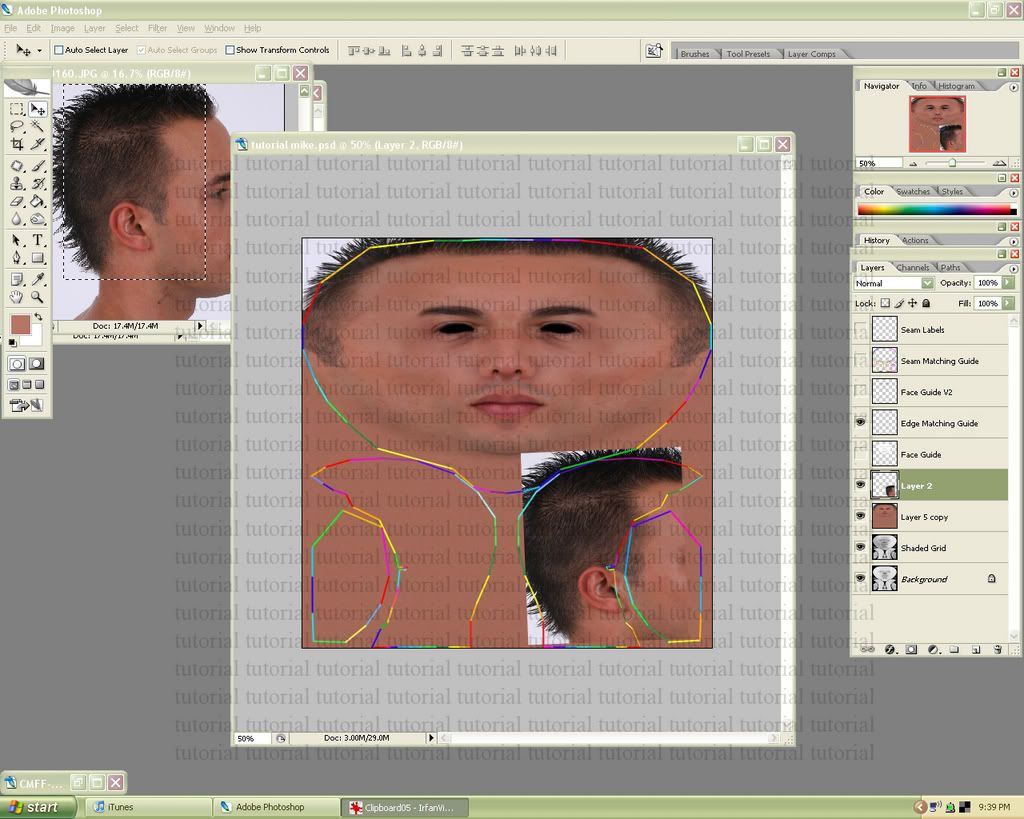
25. Side view photo: Select the ear and drag it over to the template. Resize as necessary.

26. Erase all un-needed parts of the photo. Edit the hue/saturation if the color doesn’t seem right.
27. Duplicate the ear to the other side of the texture, and make any other fine tuning adjustments. I did a small amount of re-shading with the burn and dodge tools and changed the hue. It’s also a good idea to make sure you have no perfectly symmetrical skin imperfections such as moles/scars/etc.
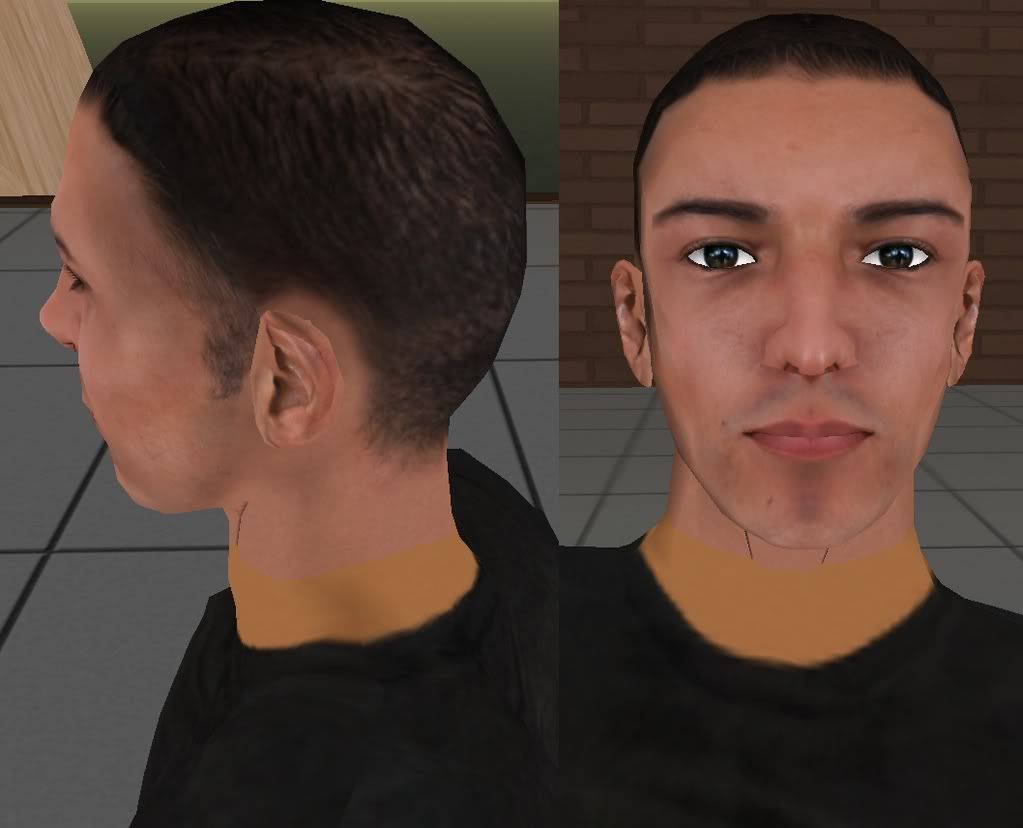
28. Here’s what it looks like in game. I have a couple of easily fixable seem issues, and some weird shading around the mouth area (line down chin, sucked in looking cheeks, dark smudges). After this you basically keep uploading and changing things around until you’ve got it right.
For this skin I used the 3d.sk (pay site for human photo references) model "Mike", since his face is perfectly suited for a SL skin.
3d.sk is an extremely extremely useful site for anyone making skins, or clothing textures, but sadly it costs money, and if you're a beginner you probably don’t want to pony up the 25 usd for some pictures. If you have a digital camera you can take photos of your friends with some good lighting. That'll probably work just as well.
Anyways I used this same model for my mens skins, so it'll look familiar. I actually think I did a better job on this tutorial skin than the one I made a year ago in my store.
I took tons of snapshots since pictures explain a lot more than words, and wrote comments about each of the pictures.
1. Front view photo: Select a section of the photograph and drag it onto the template. Make sure the ‘face guide’ layer is above the picture. Then transform (edit-transform-free transform) the picture the best you can, so that it’s somewhat aligned with the guide.
2. Use the liquify filter (filter-liquify…) to further align the photograph to the template. The best way to do this is to set the face guide layer as the backdrop, in front, at a low opacity such as 38 (bottom right in picture). Another good thing to do is mask (red part in pic) the areas you are finished working so that you don’t accidentally ruin them as you work on another section. (ex: covered the finished eye when working on the eye brows) Be really careful on this part otherwise your face will end up a little demented. After completing this stage upload your picture in game (best in the beta grid) and make sure there are no problems. If there are keep liquifying until you’re satisfied with how it turns out. (I also only do one of the eyes because I like to duplicate it later and make them perfectly symmetrical.)
3. Another thing I like to do with the eyes is color them in black. (old Sims 2 habit
) Anyways, it cleans up some of the mess in the eye area and gives your avatar a small dark rim around the eye that looks natural.4. Side view photo: (same as step 1) Grab a section of this photo and drag/transform/line it up on the template.
5. Use a soft eraser (eraser with zero hardness, 100% opacity and large size) to erase away some of the hard lines.
6. Do the same to your front view photo.
7. Duplicate one of your face layers and open up the pattern maker filter (filter-pattern maker…). Then select a small evenly textured section of the photo.
8. Click ‘Generate’. This will be used in the background of the skin. I think it’s a nicer option than just using the grain filter. Note: sometimes your pattern will look really messed up and lumpy. Just keep picking other sections of the picture and try generating them. If you can’t get it right or don’t like this method, you can make a tan layer and use the grain filter on it.
9. You might have to edit the hue/saturation a little so that it matches with the rest of your image. (image- adjustments -hue/saturation) Sorry for the ugly tutorial text everywhere. There are too many bums that will take the textures out this tutorial and try to sell them, instead of actually reading and learning how to make things themselves. (Not fool proof but it will ward off the laziest ones.)
10. Erase more of the harsh outlines/any un-needed garbage from the photograph with a soft brush.
11. Use the warp tool (edit-transform-warp) to curve the jaw line correctly on the template. Warp as many times as you need to.
12. Use the eraser tool to remove any harsh lines (like step 5) or pieces that are too close to the edge matching guide.
13. Merge all of your photo layers, and then duplicate the resulting layer. (We’re going to make the texture somewhat symmetrical) We’ll need to crop the entire layer to remove any unseen pieces outside the border. First select the entire image. (ctrl-a) Then go to image-crop. After that flip the image horizontally. (edit-transform-flip horizontally) (without cropping, your image would not have flipped over the center)
14. Now erase away the unfinished sections, leaving holes where the texture underneath is finished. After that you can merge the two layers back together.
15. At this point you can start touching up the texture how you like. I added some shine to the lips, darkened the eyes/ changed the shape a little, and did other small touch ups. Girl skins tend to take forever at this stage. (Removing blemishes, re-shading, adding highlights/shadows, changing skin rosy-ness, etc.) Thankfully this model doesn’t require too much re-working, and looks fine as is.
16. Front view photo: Go back to this photo and pull over/resize a forehead section with the hair line in it. We’ll be working on the hair
17. Just like in step 10, use the warp tool to fit the hairline to the template.
18. If you like how one side is turning out better, use the horizontal flip method (as in step 13) to make both sides the same.
19. Side view photo: Select the hairline and drag it over to the template/resize.
20. Use the warp tool again to fit the photo.
21. Erase any unnecessary parts of the picture, including the section where the ear will be.
22. You might have to warp again if you find that some parts need fine tuning. Once you get that right you can duplicate the results on the other side of the texture.
23. Next we’re going to clean up the seams a little. Find a solid patch of hair, select it, then right click and copy it.
24. Use a soft eraser to remove the harsh square edges of the patch. Then duplicate the section (alt drag) over any parts that look faded or missing. Once you’re done merge all the hair patches back together.
25. Side view photo: Select the ear and drag it over to the template. Resize as necessary.
26. Erase all un-needed parts of the photo. Edit the hue/saturation if the color doesn’t seem right.
27. Duplicate the ear to the other side of the texture, and make any other fine tuning adjustments. I did a small amount of re-shading with the burn and dodge tools and changed the hue. It’s also a good idea to make sure you have no perfectly symmetrical skin imperfections such as moles/scars/etc.
28. Here’s what it looks like in game. I have a couple of easily fixable seem issues, and some weird shading around the mouth area (line down chin, sucked in looking cheeks, dark smudges). After this you basically keep uploading and changing things around until you’ve got it right.


")