need help for maya please
|
|
yondaime Larsson
Registered User
Join date: 23 May 2007
Posts: 5
|
08-17-2009 10:46
hello everyone ") , i'm trying to sculpt a blade with maya but i got some problem when i upload the sculpt in secondlife. i made the blade with curves and loft and on maya it looks not bad but when i upload it on sl it looks really deformed and with less precision than on maya. on maya: 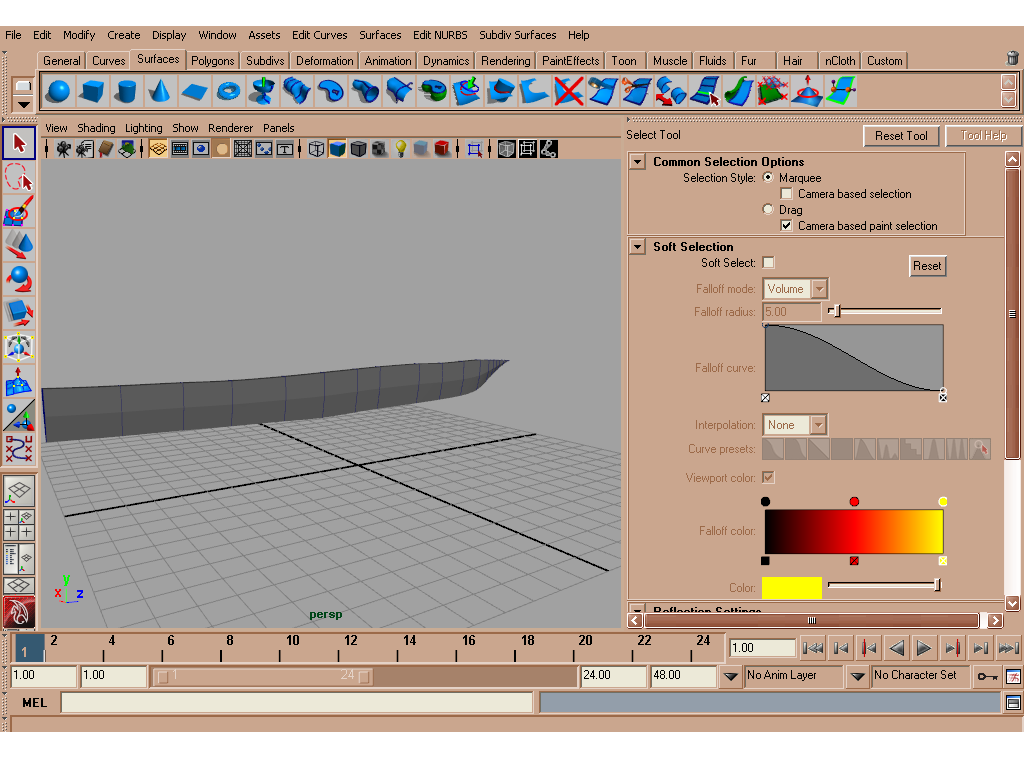 on secondlife: 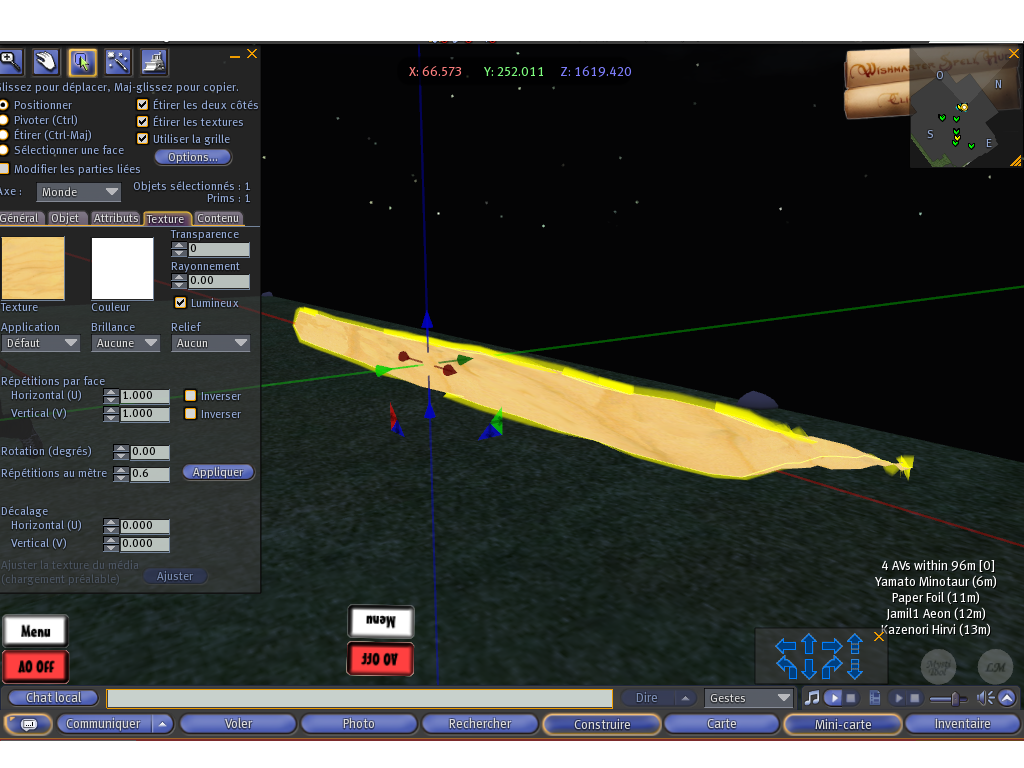 |
|
Chosen Few
Alpha Channel Slave
Join date: 16 Jan 2004
Posts: 7,496
|
08-17-2009 14:54
Did you remember to delete history and freeze & reset transformations before you exported?
Also, lofts don't always result in sculpty-compatible geometry. For best results, stick with deforming primitives, rather than lofting. You could make that sword pretty easily from a deformed sphere or cylinder, in no more time than it would take to draw the curves and loft.
You might also want to consider that there's more than enough detail available in a single sculpty to create a typical blade, hilt, and handle, all as one object, especially if you're using oblongs. It's a bit of a waste to expend 2048 polygons on a blade that could be made from double digits.
By the way, interesting screenshot. Is that French? I took French in school, 20 years ago. About all I remember how to say is "Where's the party?" and "Where's the bathroom?" That's really all you need, right?
_____________________
.
Land now available for rent in Indigo. Low rates. Quiet, low-lag mainland sim with good neighbors. IM me in-world if you're interested.
|
|
yondaime Larsson
Registered User
Join date: 23 May 2007
Posts: 5
|
08-18-2009 11:22
From: Chosen Few Did you remember to delete history and freeze & reset transformations before you exported? i deleted the history and retryed and it was better. From: Chosen Few Also, lofts don't always result in sculpty-compatible geometry. For best results, stick with deforming primitives, rather than lofting. You could make that sword pretty easily from a deformed sphere or cylinder, in no more time than it would take to draw the curves and loft. i tryed to make a blade with a nurbs sphere 16 sections and 7 spans .i deformed it by scaling and moving the vertex points but it looks take much time .maybe there is a trick for make it easy i don't know. then when i upload (i cleared history and freeze & reset transformations) it was worst  . on maya: 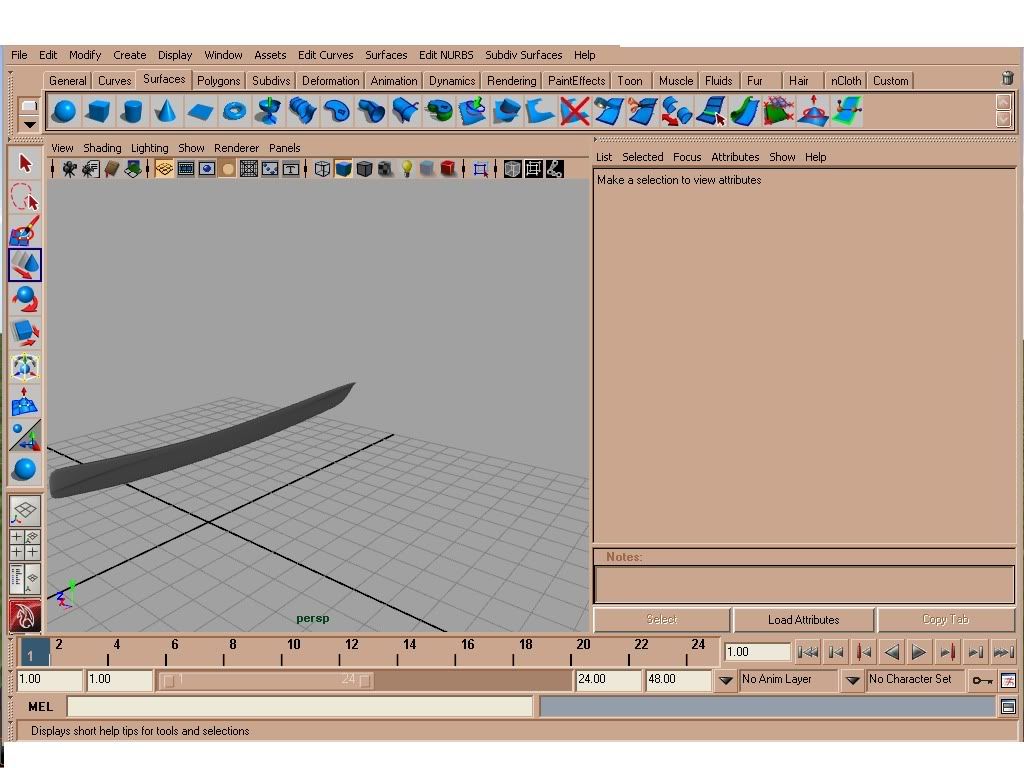 on secondlife: 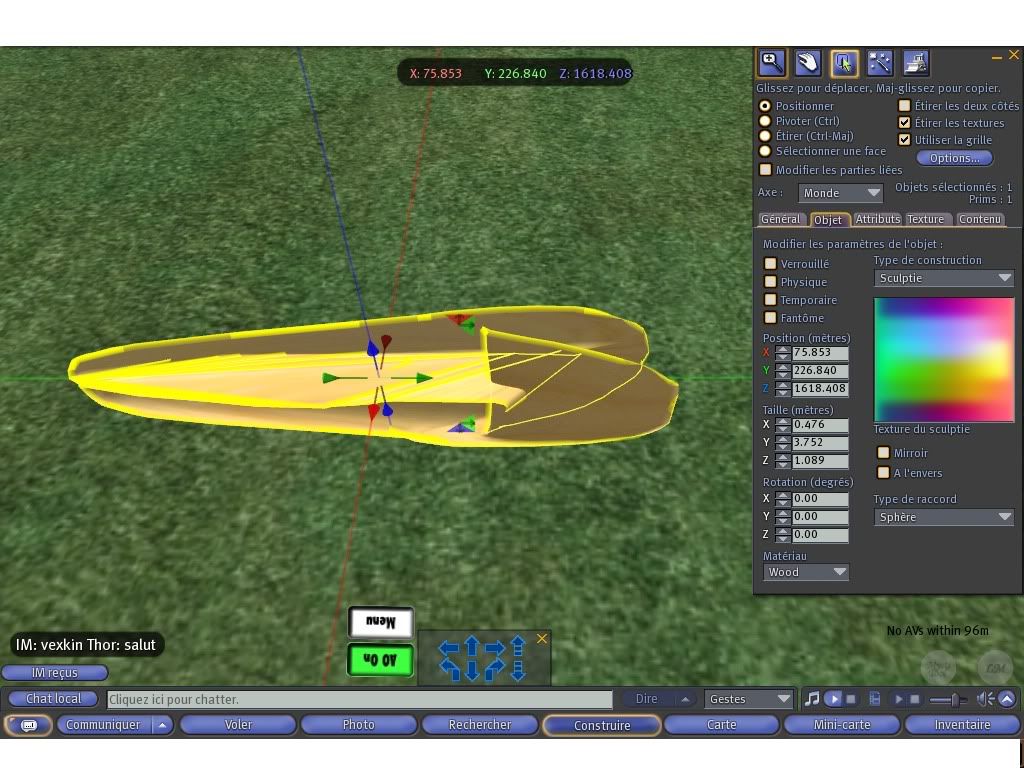 with cylinder i don't know make sculpt .i only use nurbs sphere curves and loft. i tryed use cylinder for a pant a while ago but in uplaod it was deformed . i'm confused with the top and down of nurbs cylinder. From: Chosen Few You might also want to consider that there's more than enough detail available in a single sculpty to create a typical blade, hilt, and handle, all as one object, especially if you're using oblongs. It's a bit of a waste to expend 2048 polygons on a blade that could be made from double digits.
i don't know what are blong and how to use this tool. i only need the blade in 1 prim ,i have already the others part (non sculpty). From: Chosen Few By the way, interesting screenshot. Is that French?
yes it is From: Chosen Few I took French in school, 20 years ago. About all I remember how to say is "Where's the party?" and "Where's the bathroom?"
nice it's rare that somoene choose french in school lol. Ou est la fête? Ou est la salle de bain? From: Chosen Few That's really all you need, right? Is there a limit for numbers of spans and sections? well if there is a cool way to make this blade of katana fas i'm ready to listen . |
|
Gaia Clary
mesh weaver

Join date: 30 May 2007
Posts: 884
|
08-18-2009 13:52
I guess, you want something like that ?  The main problem with such a shape is that sculpted prims have notorious problems when one axis gets significant longer than the others. The effect is, that the edges get very jaggy, if you do not take care about the vertex resolution, which is 1/256 along each axis. So you need to shift your edge vertices to positions on the 256*256*256 grid spanned along the bounding box of your object. I have shown the basic principles of such sculpting work in "the arch example" tutorial on the machinimatrix blog, where i take care about precise sculpting. I must admit, that i did not use Maya to create the blade above. But i am sure that the basic principles of sculpted prims also apply there and as long as you can shift single vertices around your 3D view, you eventually can get a sharp edge for your knife in SL. And another hint: Try to work with low LOD meshes first (if that is possible with Maya). The blade above does not suffer from any degradations when you move away from it (as you can see so often when LOD effects have not been taken into account). ah, for the construction: i used a cylinder, flattened it and then moved the edge vertices along the grid, until the blade was like i wanted it to be. Then i baked it and imported it to SL. I hope, i could help a bit. good luck, Gaia |
|
Chosen Few
Alpha Channel Slave
Join date: 16 Jan 2004
Posts: 7,496
|
08-18-2009 22:16
From: yondaime Larsson i tryed to make a blade with a nurbs sphere 16 sections and 7 spans .i deformed it by scaling and moving the vertex points but it looks take much time .maybe there is a trick for make it easy i don't know. There are definitely some tricks that can speed things up for you. Deformers, for example are very powerful, and very fast. You'll find them in the animation section of Maya, since that's what they're most often used for, but they're also fantastic modeling tools. Really, though, it just comes down to getting used to the medium. Modeling for sculpties is pretty different from modeling for any other purpose. Little changes in your thinking about things like order of operations can make huge differences in the amount of time things take you. From: yondaime Larsson then when i upload (i cleared history and freeze & reset transformations)
it was worst :(. Yikes, not sure what happened there. As long as you didn't break your source geometry, you deleted history, froze & reset all transformations, and uploaded your sculpt map losslessly, it should have worked. I'm not sure what you did wrong, sorry. If it helps, here's how I'd do it. This took me about 25 minutes, from start to finish, just now:    And here it is in SL:  If I were making this for a real project, I'd give it a lot more detail in the texturing, and I'd model more carefully to avoid any 8-bit rounding errors. But hopefully there's enough there for you to get the idea. From: yondaime Larsson with cylinder i don't know make sculpt .i only use nurbs sphere curves and loft.
i tryed use cylinder for a pant a while ago but in uplaod it was deformed .
i'm confused with the top and down of nurbs cylinder. If I'm reading you right, you were confused by the fact that the top and bottom of the cylinder were open. Is that correct? If you want to close the top and bottom, simply snap those hulls to single points. From: yondaime Larsson Is there a limit for numbers of spans and sections? Technically, no, there's no limit on what your source model can have. But for best results, stick with the following numbers. Use 16 sections and 16 spans for standard sculpties, and for oblongs, use 32x8 or 64x4. Remember, inside SL, your sculpties willl be made from 2048 polygons. The standard configuration is 32x32 quads. Oblong configurations can be 64x16 and 128x8*. For the most consistent match between your NURBS source model and the in-world poly model, half the number of sections and spans as the number of polygons tends to work best. *Note, 128x8 might actually have been changed to 128x6. I haven't looked at it in a while. LL had talked about making that change in order to cut down on render lag. I'm not sure if they did it or not. I don't often use that particular ratio. But whether it was or wasn't changed, the NURBS source should still be 64x4. Also, remember to keep your map image size as small as possible, so that you can upload it losslessly. Use 64x64 for standard, and 128x32 or 256x16. for oblongs. From: Gaia Clary
The main problem with such a shape is that sculpted prims have notorious problems when one axis gets significant longer than the others. The effect is, that the edges get very jaggy, if you do not take care about the vertex resolution, which is 1/256 along each axis. So you need to shift your edge vertices to positions on the 256*256*256 grid spanned along the bounding box of your object.
I have shown the basic principles of such sculpting work in "the arch example" tutorial on the machinimatrix blog, where i take care about precise sculpting.
I must admit, that i did not use Maya to create the blade above. But i am sure that the basic principles of sculpted prims also apply there and as long as you can shift single vertices around your 3D view, you eventually can get a sharp edge for your knife in SL.
And another hint: Try to work with low LOD meshes first (if that is possible with Maya). The blade above does not suffer from any degradations when you move away from it (as you can see so often when LOD effects have not been taken into account).
Good tips, as always, Gaia, but they're not all necessarily applicable to the sculpty process in Maya. I'll explain. Due to the way the Maya sculpty exporter works, concerns over vertex precision are greatly minimized. The exporter samples the surface, to create a polygonal approximation of the NURBS source model. It doesn't much care where the actual vertices are, as that would be almost pointless, since the NURBS surface itself is just an interpolation. The result of the process is that sculpties sourced from Maya tend to have fairly uniform geometry, right off the bat. While this makes certain kinds of "pixel-pusher" objects a little harder to make, it also carries a lot of advantages, not the least of which is fairly robust LOD-proofing without having to try very hard. Ideally, I'd want an exporter that could do both the NURBS sampling the Maya exporter already does, and the precision vertex reporting you're used to from the Blender exporter. I've been trying to hire someone to write a dual-function exporter for a long time now, but I haven't yet been able to find either a MEL programmer with a good enough understanding of SL, or an SL user fluent enough with MEL, to make it work. If anyone reading this thinks you can do it, there's money in it for you. IM me.
_____________________
.
Land now available for rent in Indigo. Low rates. Quiet, low-lag mainland sim with good neighbors. IM me in-world if you're interested.
|
|
Gaia Clary
mesh weaver
Join date: 30 May 2007
Posts: 884
|
08-19-2009 00:14
From: Chosen Few Ideally, I'd want an exporter that could do both the NURBS sampling the Maya exporter already does, and the precision vertex reporting you're used to from the Blender exporter. I am not sure about the exact algorithms used in the blender exporter, but i can see that similar effects as you describe, can be achieved when you work in blender's subsurf mode (which creates LOD-preserving objects automatically). Then in the final step i very often take my model and use a script to make the model conform to the SL rules. That will show me exactly, where my model will get rough and ugly. So i can rework my model details until i am satisfied, then export and be sure, whatever i have done, will be exactly replicated in SL. Nevertheless your example looks so much better than mine. And that proofs that exact modelling not always leads to nice artwork ") But at least i can tell how to model the tip of the blade without suffering from degradations in SL |
|
Gaia Clary
mesh weaver
Join date: 30 May 2007
Posts: 884
|
08-19-2009 03:23
From: Chosen Few If it helps, here's how I'd do it. This took me about 25 minutes, from start to finish, just now I am just in the mood to make a video tutorial out of this. May i reuse the outline of your example for this purpose ? |
|
yondaime Larsson
Registered User
Join date: 23 May 2007
Posts: 5
|
08-19-2009 11:09
thanks a ton guys , i'll follow Chosen's tuto and i'll be back for post the result . |
|
Chosen Few
Alpha Channel Slave
Join date: 16 Jan 2004
Posts: 7,496
|
08-19-2009 12:02
From: Gaia Clary But at least i can tell how to model the tip of the blade without suffering from degradations in SL D'oh! Just to be clear, the problem with the tip of the sword was my own stupid error. It had nothing to do with Maya, the sculpty exporter, or SL. Want to know what it was? You'll laugh. I set the dimensions backwards for the map size. I did 128x32 when it should have been 32x128. Here's a screenshot with both the original, and the corrected orientation:  Hey, it was late at night, and I was working quickly. I'm entitled to at least one silly error, right? From: Gaia Clary I am just in the mood to make a video tutorial out of this. May i reuse the outline of your example for this purpose ? Sure, go ahead.
_____________________
.
Land now available for rent in Indigo. Low rates. Quiet, low-lag mainland sim with good neighbors. IM me in-world if you're interested.
|
|
Gaia Clary
mesh weaver
Join date: 30 May 2007
Posts: 884
|
08-19-2009 14:37
From: Chosen Few D'oh! Just to be clear, the problem with the tip of the sword was my own stupid error. It had nothing to do with Maya, the sculpty exporter, or SL. Want to know what it was? You'll laugh. I set the dimensions backwards for the map size. Apologize, i didn't want to sound pretencious(?) at all. I only saw, that the tip of the blade can become a problem if you don't take care. And i thought, that the shape of your SL-version was an effect of the exporter. Glad to learn, that this is not the case. By the way it looks like the Maya exporter indeed creates less rough output than the blender exporter does. We (ok, Domino have to take a look at that ... |
|
Chosen Few
Alpha Channel Slave
Join date: 16 Jan 2004
Posts: 7,496
|
08-19-2009 16:47
Nah, you didn't sound pretentious at all, so don't worry about it. The conclusion you drew from my mistake was not unreasonable.
As for "rough output", I'm not sure exactly what you mean. My understanding is that the Blender exporter will spit out exactly what you put into it, correct? So if your poly model is smooth, your sculpty should be smooth as well.
The difference with the Maya exporter is that since the source modeling is NURBS-based, shapes are going to be smooth by default. You have to go out of your way to make anything NOT smooth. With poly modeling, it's almost the opposite. Shapes are going to be angular by default, and you have to put in extra work to smooth them out.
_____________________
.
Land now available for rent in Indigo. Low rates. Quiet, low-lag mainland sim with good neighbors. IM me in-world if you're interested.
|
|
yondaime Larsson
Registered User
Join date: 23 May 2007
Posts: 5
|
08-20-2009 21:54
hello ,i tryed to follow Chosen's sword tutorial and i learnd a lot . so it was a 16 section and 16 spans sphere that i transformed to a cylinder with a rebuilt surface with spans U=32 and spans V=8 . i saved the texture in 32*128 as you did . i made one with bend deformer and an other without bend deformer: without bend deformer (just litle moved vertexs for bend): i think my blade 's point need to be better and the blade's up is too round on up side i did pics of my blade and a one of a good blade i bought . (the textured one is the one i bought) on maya: 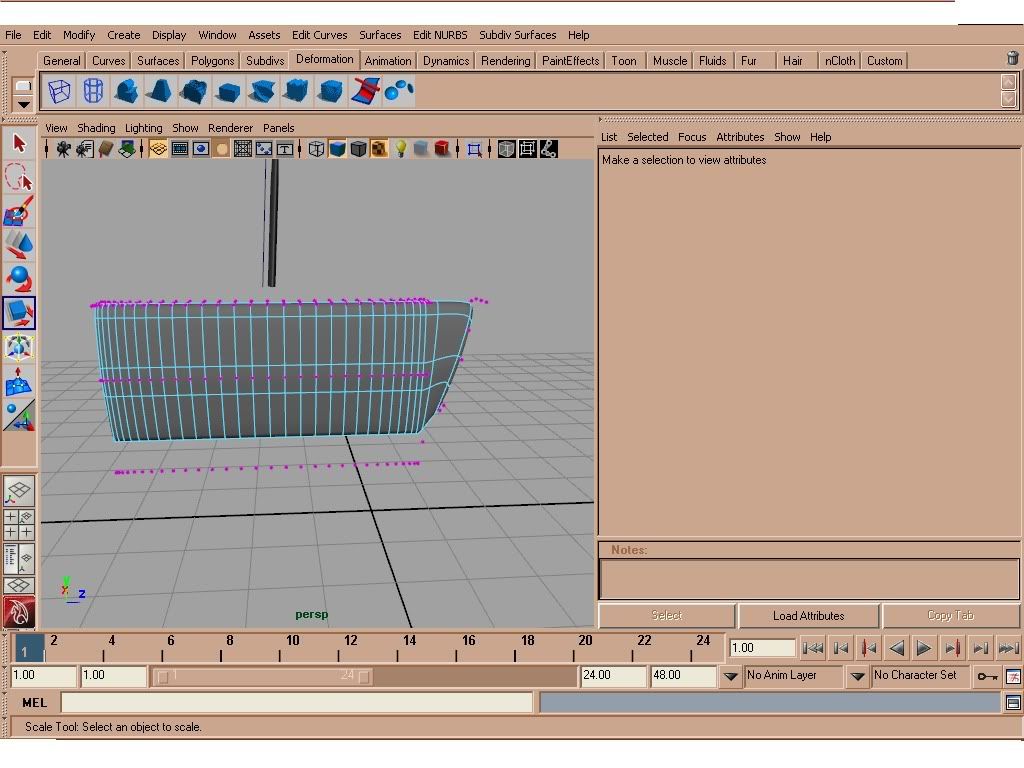 on secondlife: 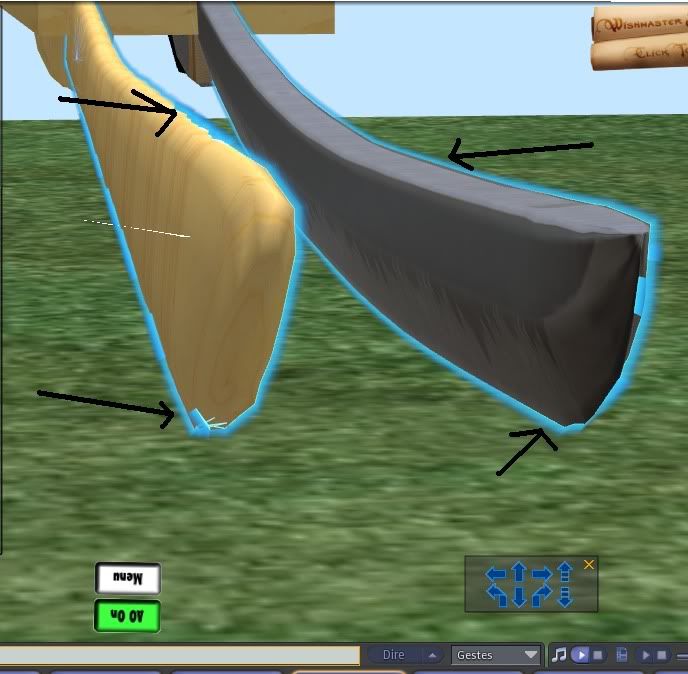 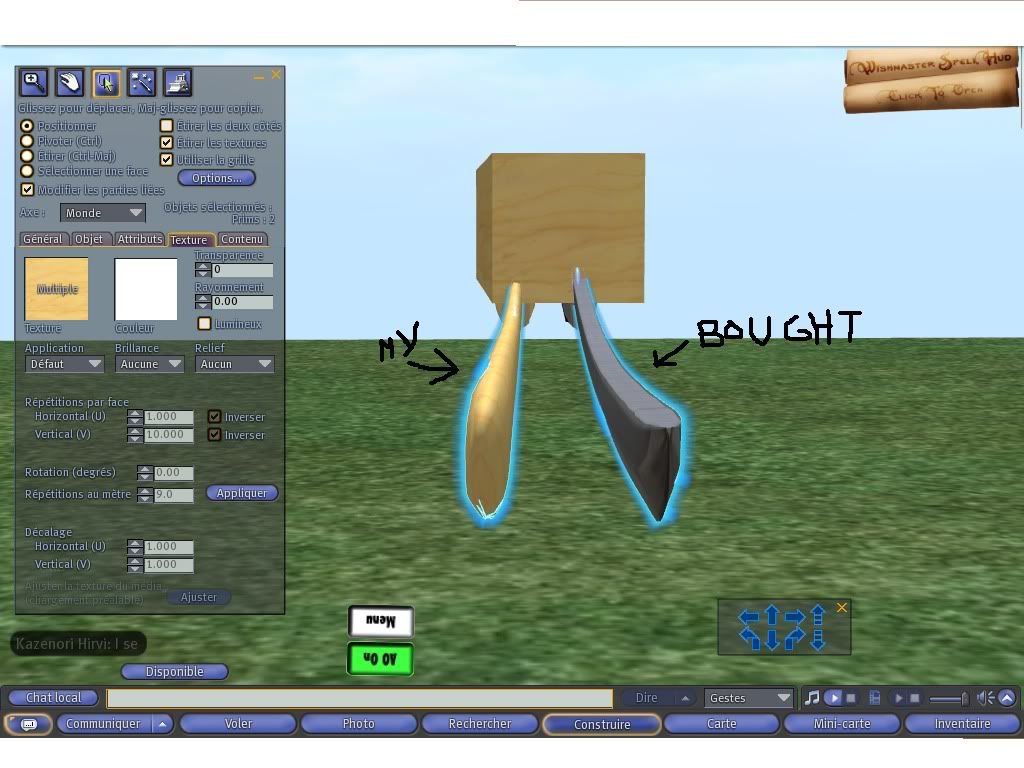 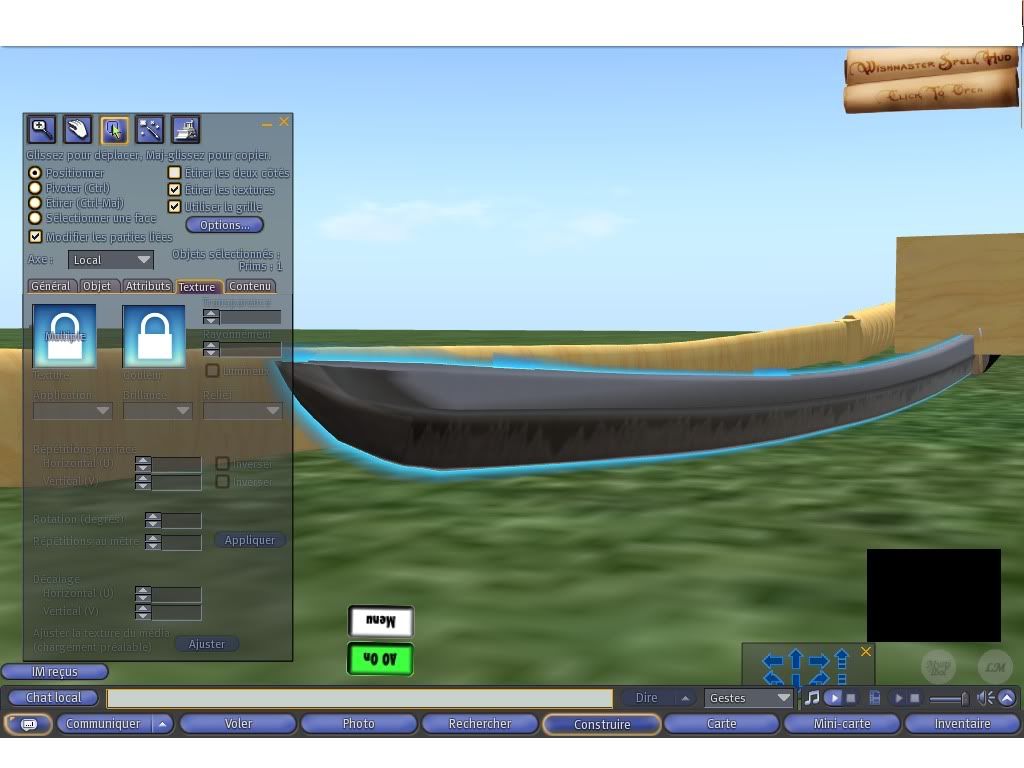 i got problems with the bend deformer ,the blade looks have more bad relief as the this pic: on maya: 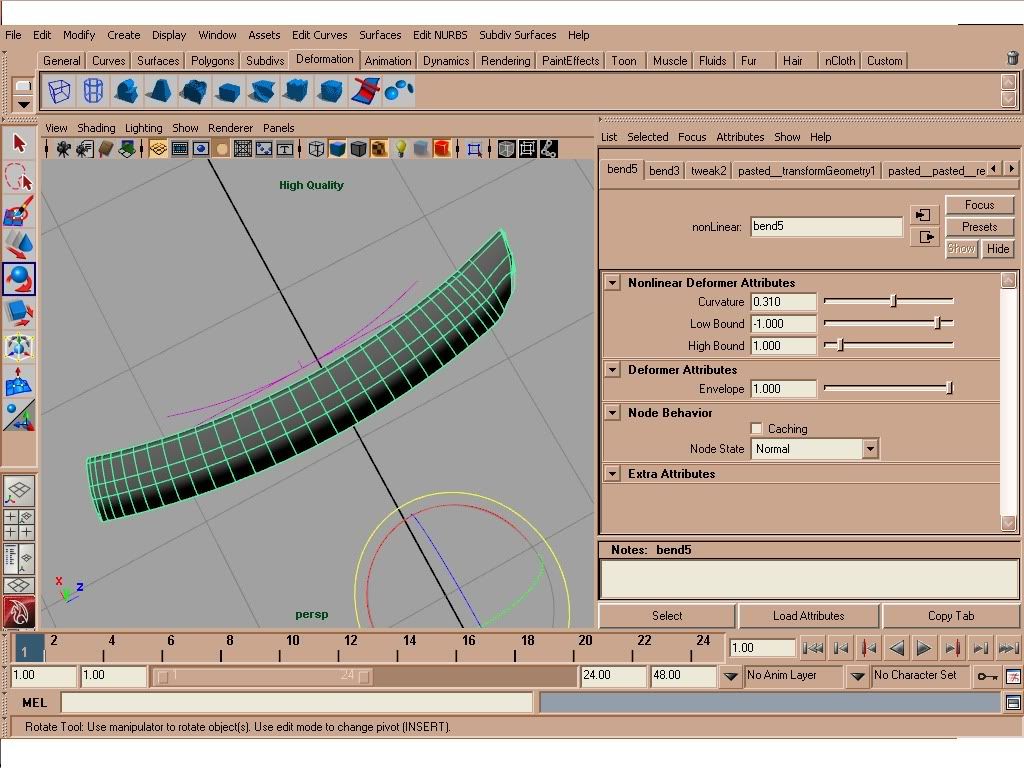 on secondlife 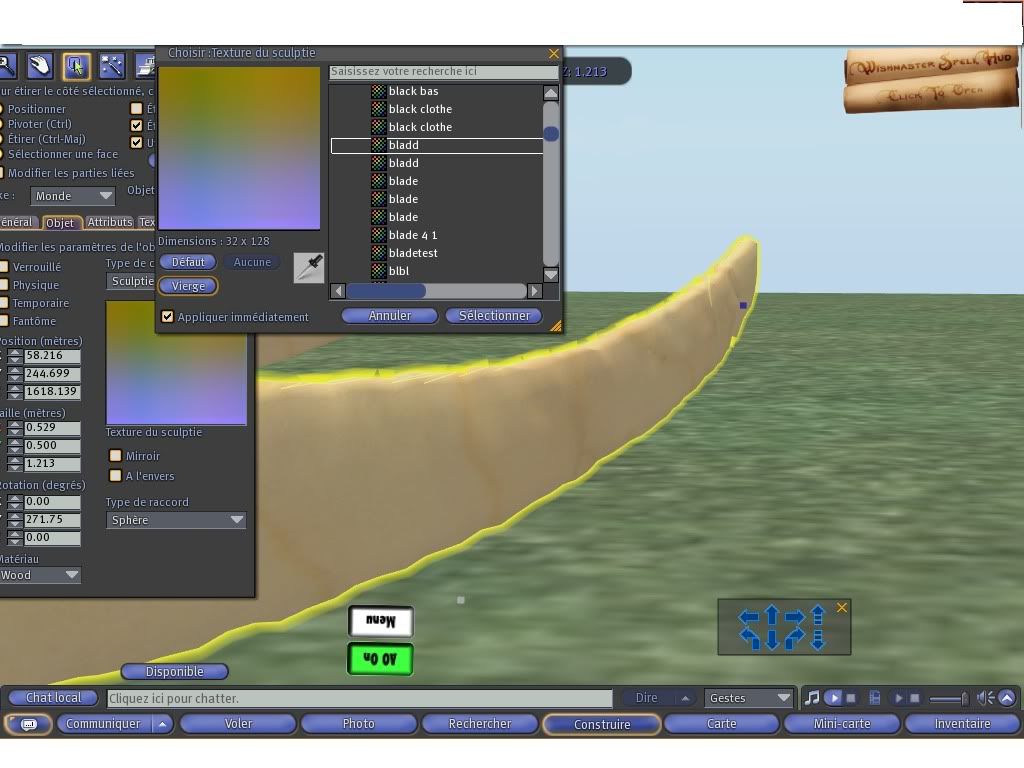 |
|
Chosen Few
Alpha Channel Slave
Join date: 16 Jan 2004
Posts: 7,496
|
08-21-2009 07:58
From: yondaime Larsson hello ,i tryed to follow Chosen's sword tutorial and i learnd a lot . Glad to hear it. Thanks for posting your results so far. Looks like you're starting to get the hang of it. From: yondaime Larsson so it was a 16 section and 16 spans sphere that i transformed to a cylinder with a rebuilt surface with spans U=32 and spans V=8 .
i saved the texture in 32*128 as you did . Note, the reason I rebuilt the surface was so that there would be enough horizontal isoparms to build the hilt and handle parts. If all you're doing is the blade, you've got more options for how you want to distribute the geometry. If I were doing only a blade, I'd probably keep it at 16x16, in order to get sharper corners. From: yondaime Larsson without bend deformer (just litle moved vertexs for bend):
i think my blade 's point need to be better and the blade's up is too round on up side i did pics of my blade and a one of a good blade i bought .
(the textured one is the one i bought) I agree that the back of yours shouldn't be so round, but it also shouldn't be quite as flat as on the one you bought. On a real katana, the back is usually beveled. Sabers often have flat backs like that, but katanas usually don't. In any case, the solution is easy. If you built yours like mine, you should have three longitudinal hulls forming the spine. Simply move the vertices into better alignment, so they're more flush with each other. That back should straighten right out. From: yondaime Larsson i got problems with the bend deformer ,the blade looks have more bad relief as the this pic: Remember, on a real katana, the curve extends all the way through the handle. Since you're doing only the blade, you need to accound for the missing piece. Move the deformer, so its centered where the midpoint of the whole sword would be, rather than just at the midpoint of the blade. You also might want to adjust the high bound and low bound values. I notice your in-world version of the blade that was created with the deformer looks very lumpy. To make it smooth, remember to delete history (which will remove the deformer), freeze & reset transformations, and upload your sculpt map losslessly. All that said, if you're not comfortable with deformers, you don't have to use them. They're just time savers, nothing more. If you'd rather just move vertices around by hand, there's nothing wrong with that. It will just take you a lot longer is all. From what I can see in your fifth screenshot, your handle looks pretty good, by the way. My only crticism would be you've got an awful lot of geometry invested in something that's going to be obscured by the avatar's hand. In my opinion, it would be a lot more sensible to simplify the geometry, and make up for the detailing with good texturing. It's up to you, though. Either way works.
_____________________
.
Land now available for rent in Indigo. Low rates. Quiet, low-lag mainland sim with good neighbors. IM me in-world if you're interested.
|
|
Gaia Clary
mesh weaver
Join date: 30 May 2007
Posts: 884
|
08-21-2009 17:26
From: Chosen Few Note, the reason I rebuilt the surface was so that there would be enough horizontal isoparms to build the hilt and handle parts. If all you're doing is the blade, you've got more options for how you want to distribute the geometry. If I were doing only a blade, I'd probably keep it at 16x16, in order to get sharper corners. It may be helpfull to note, that with oblongs you get more vertices along one axis, but you do NOT(!) increase the vertex resolution along this axis. The reason is simple: The introduction of oblongs has not increased the available color space. Hence for each axis there are still only 256 available locations where a vertex can be positioned. And by the way this limitation due to the used color space will not make it reasonable to create sculpties with more than 255 faces along one axis With very long objects (like the blade) you might be tempted to use oblongs to increase quality. But very often the opposite is true and you just get more places where you need to fine control to avoid jaggy edges. So the advice is simple: "Do not use oblongs if you do not absolutely need the vertices" along the axis. And another tip (sadly but true): The SL Importer has got problems with sculptmaps where one side of the image is smaller then 64 pixels (32 faces). I still get best results with 32*32 sculptmaps when it comes to precision work... cheers, Gaia |
|
Chosen Few
Alpha Channel Slave
Join date: 16 Jan 2004
Posts: 7,496
|
08-21-2009 20:22
16-bit/channel sculpt maps sure would be nice, wouldn't they?
_____________________
.
Land now available for rent in Indigo. Low rates. Quiet, low-lag mainland sim with good neighbors. IM me in-world if you're interested.
|