Making a surface texture in Blender for sculpties. Why is it so blurry?
|
|
Paulo Dielli
Symfurny Furniture
Join date: 19 Jan 2007
Posts: 780
|
12-16-2009 19:59
First I want to thank Gaia and Domino for helping me create LOD-invariant sculpties in Blender. I've studied hard and it worked: my new lounge chair has excellent LOD! Here's a pic from the lounge chair. To maintain perfect LOD, it's made with 4 different sculpty textures and has 5 sculpty prims alltogether (the blue chair leg is copied) plus 1 regular shadow prim: 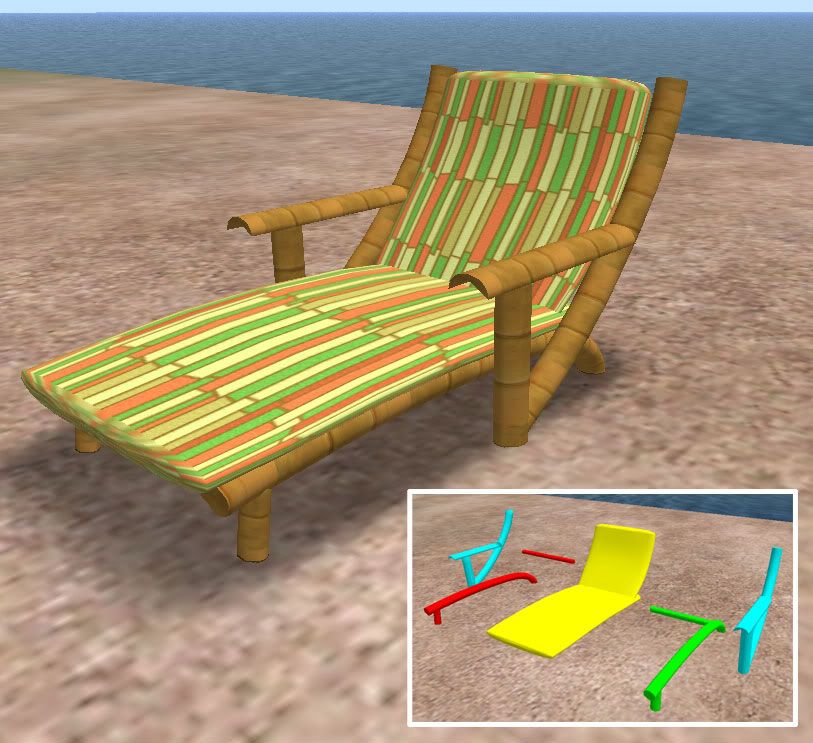 But now I'm stuck with texturing. Please look at the next picture: 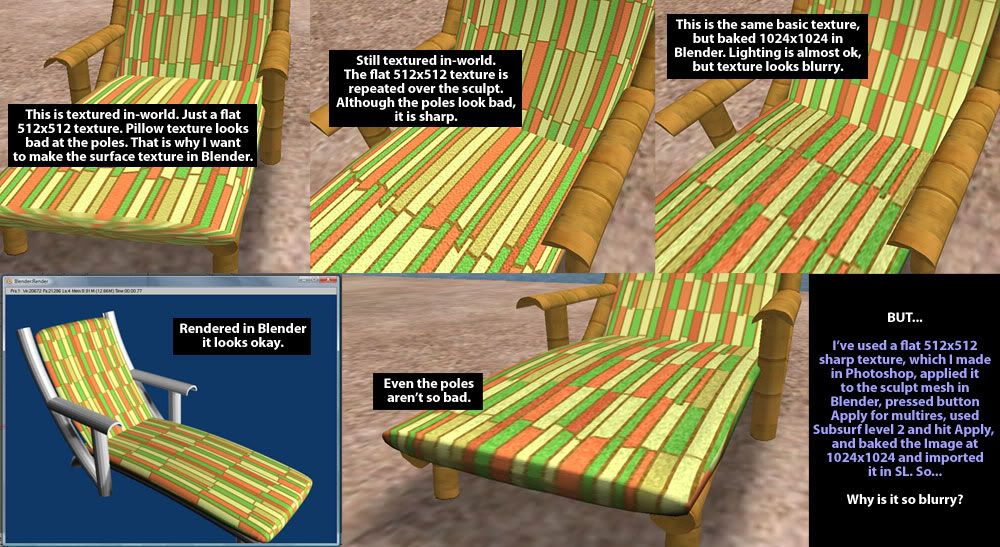 My Blender surface texture is 1024x1024. That should be big enough for this pillow or isn't it? Why is it so blurry? [edit:] Oh wait. In Blender I applied the texture in Map Input as a Cube, because that was the only way that the texture could be divided well on the pillow. But I believe that sculpties are rezzed as a sphere. Could that have something to do with it? |
|
Chosen Few
Alpha Channel Slave
Join date: 16 Jan 2004
Posts: 7,496
|
12-17-2009 01:00
First, let me say your cubic projection worked really well, resolution problems notwithstanding. The stripes cross the poles with only very minimal distortion. Nicely done.
One option you might want to look into to make it look even better is does Blender have the ability to do a tri-planar projection? If it does, that could give you greater control over the texture placement on each side of the cushion than you might get with a cubic projection. At least, that's how it works in Maya.
As for the blurring, my guess is what you're seeing is the result of a flat lighting bake on a texture that's supposed to look bumpy, but doesn't actually have a bump map applied to it. Prior to the bake, the color noise on your flat texture served to provide an illusion of depth, to some degree. But once you baked lighting onto it, that illusion was broken, as light and shadow spread evenly across the surface. The result is the baked texture looks pixelated instead of bumpy. For lack of a better phrase, the lighting bake called the original texture's bluff. It proved it was just a flat image.
What I would suggest is that you make a new source texture, without the noise. Then apply a proper bump map in Blender to create the depth. If Blender can generate 3D volume noise, that would work quite well for this. If not, then a 2D noise map, projected either either cubically or tri-planarly, should do the trick.
As I said, that's just a guess. I'm not a Blender user, so I can't speak from actual experience. I'm mainly drawing on parallel experience from Maya. It may or may not be applicable, but it's worth exploring.
_____________________
.
Land now available for rent in Indigo. Low rates. Quiet, low-lag mainland sim with good neighbors. IM me in-world if you're interested.
|
|
Domino Marama
Domino Designs
Join date: 22 Sep 2006
Posts: 1,126
|
12-17-2009 04:02
Try turning off MipMap and Interpol on the texture. These work well for renders, but it's generally best to disable them for texture baking.
_____________________
Visit http://dominodesigns.info for the latest Primstar info
|
|
Paulo Dielli
Symfurny Furniture
Join date: 19 Jan 2007
Posts: 780
|
12-17-2009 19:30
Thanks Chosen and Domino, I've tried a bit more. Like Chosen suggested, I have now used the flat texture without any Photoshop-effects, applied it to the mesh and created a 1024x1024 image in Blender. In Blender I also disabled MipMap and Interpol, like Domino said. It still looked blurry inworld, so I baked it in Blender again at a huge size of 2048x2048. After that I've changed it in Photoshop to 1024x1024 and added a little sharpness. The result is better. On the right is the regular (repeated 3x ") texture, on the left the 1x1 sculpty surface texture: 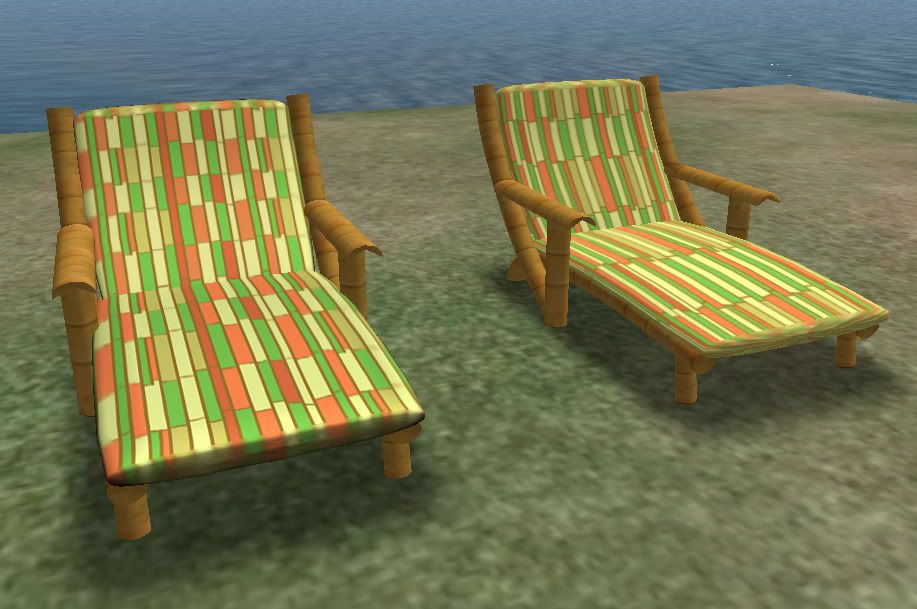 But when you zoom in, you can see that the Blender texture is still blurry (above is inworld texturing, below Blender texturing): 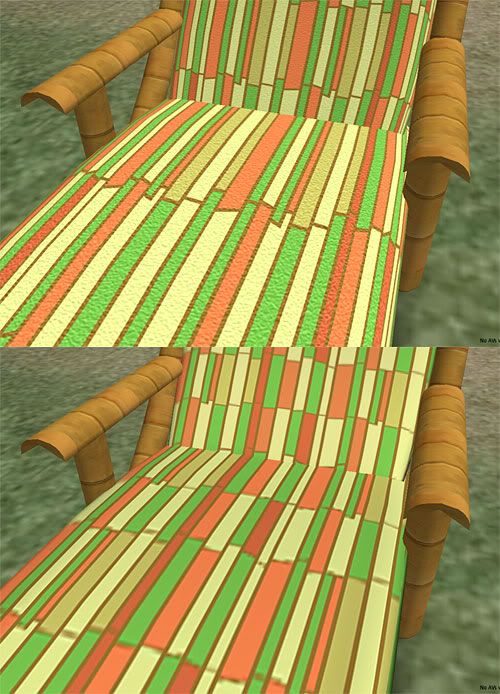 I understand that the Blender surface texture can only be repeated 1x1 time, whereas the inworld texture is repeated many times (3 horizontal, 8 vertical). So it is logical that the inworld texture is sharper. But still: are there any methods to improve the Blender-texture? Oh, one last question: when I use just the flat texture and want to apply some kind of bump map in Blender to simulate a weave texture, how do I do that? I've checked several tutorials for this, but couldn't find how you can apply a bump map ON an image. When I use an extra texture for stucci, for example, I just get coloured bumps on my texture, but not depth. I've checked the Nor button and changed settings, but I just got a lot of spots on my original pillow texture. |
|
Chosen Few
Alpha Channel Slave
Join date: 16 Jan 2004
Posts: 7,496
|
12-17-2009 22:02
From: Paulo Dielli I understand that the Blender surface texture can only be repeated 1x1 time, whereas the inworld texture is repeated many times (3 horizontal, 8 vertical). So it is logical that the inworld texture is sharper. But still: are there any methods to improve the Blender-texture? That's likely the crux of the problem right there. When you repeated the 512x512 texture 3x8 times, you effectively covered the surface with 1536x4096 pixels. That's more than six times as many pixels as your single 1024x1024. So it figures that the 1024 should be only 1/6 as sharp. But I'd be hard pressed to believe that that's ALL there is to it. Quite obviously, there are tons and tons of sculpties with baked textures on them that are MUCH sharper than what you've got there. So something else must be going on as well. Unfortunately, I'm not sure what else to suggest to fix the problem. I just don't know that much about Blender, or how its renderer works. Sorry I can't be of more help. With any luck, Domino, or some other benevolent Blender user will have some more input for you. From: Paulo Dielli Oh, one last question: when I use just the flat texture and want to apply some kind of bump map in Blender to simulate a weave texture, how do I do that? I've checked several tutorials for this, but couldn't find how you can apply a bump map ON an image. When I use an extra texture for stucci, for example, I just get coloured bumps on my texture, but not depth. I've checked the Nor button and changed settings, but I just got a lot of spots on my original pillow texture. You don't apply the bump map to the texture image. You apply it to the same material that the base texture is also applied to, and then you render the whole kit and kaboodle as a single baked texture. (Or, you could do two separate render passes, and composite them by hand in Photoshop.) Remember, your base texture is itself just a map, a color map. A bump map is the exact same kind of thing, just applied to a different channel. When you applied your base texture in the first place, you told it to output to the material's color channel, right? For the bump map, just create a second image with your bump pattern on it, and set that to output to the material's bump channel. You can do likewise for specularity, reflectivity, transparency, etc., etc., etc. FYI: I could be wrong, but I seem to recall Blender uses the normal channel for bumps, instead of having a discrete bump channel. If you don't see "bump" as an output option, try using "normal". Again, I do not know the exact commands to give you a step by step, as Blender is really not my bag. But hopefully this conceptual information is still helpful for you. For more specifics, you'll find that if you Google for "Blender bump map tutorial", there are a lot of articles and videos to be found (assuming nobody here steps up to give you the specifics first).
_____________________
.
Land now available for rent in Indigo. Low rates. Quiet, low-lag mainland sim with good neighbors. IM me in-world if you're interested.
|
|
Domino Marama
Domino Designs
Join date: 22 Sep 2006
Posts: 1,126
|
12-18-2009 01:32
Normal maps depend on lighting so you have to use a full bake, not a texture bake.
I'll typically do a normal bake, an AO bake and a texture bake (which is colours only), then use those three images to create a material for the final full bake. You can go straight to a full bake from the original materials, but I find this two step process quicker for doing adjustments.
_____________________
Visit http://dominodesigns.info for the latest Primstar info
|
|
Kornscope Komachi
Transitional human

Join date: 30 Aug 2006
Posts: 1,041
|
12-18-2009 04:12
Couple of things I can think of to experiment with: (on top of what these gentlemen have mentioned)
On the ends, try to close on Z axis instead of pulling all to verts to the centre. You wont have those ugly triangles to deal with. (Start with a cylinder of course. If you haven't already)
To bump map, make a grey-scale image of the texture, Remember, middle grey has no height, dark (heavy) sinks and light floats (you can use the color map (same texture, same repeats) but either way make sure it's smooth with no noise, maybe blur and sharpen again) set to another texture layer in the materials, goto the texture tab and set the Map To.. to Nor (Normals) instead of Col (Color). You may see what it does when you do that in the preview. Use the Nor slider to adjust it. Clicking Nor again will invert the Bump effect (Like 3 settings. Off up and down)
And always keep those faces as even and as square as possible. Any stretching will distort the final texture result. Use an oblong sculpt maybe. (Again, if you havn't already)
Just my 2c, but I'm no expert either.
_____________________
SCOPE Homes, Bangu
-----------------------------------------------------------------
|
|
Paulo Dielli
Symfurny Furniture
Join date: 19 Jan 2007
Posts: 780
|
01-02-2010 20:33
I am two weeks further and oh boy... I've experimented, uploaded and learned A LOT. This is where I am right now, and I'm pretty happy: 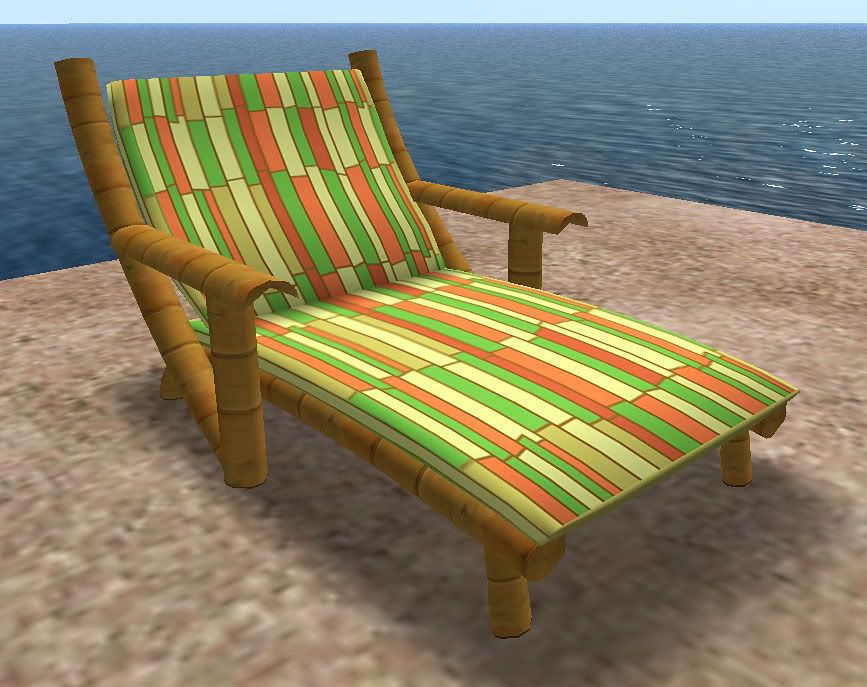 I baked the pillow texture in Blender in various ways. But whatever i tried, I couldn't get the baked texture to become sharp. Chosen was of course right: too few pixels to make it sharp. So I tried a different approach. I baked the texture in Blender but used it as a template for Photoshop. I made some checkmarks on the Blender texture, using Texture Paint, so I could see where the important boundaries of the sculpt and texture were. Then I rebuilt the entire texture in Photoshop and made it as sharp as I could. Even draw pixel by pixel new stripes. This new texture looks completely different as the baked Blender texture. But it worked. I got rid of the wrinkled poles and even managed to make a curved stripe at the left and right side of the pillow (and shadows). One thing didn't work though: the bamboo legs of the chair. Whatever I tried, I couldn't get it sharp. Also because stripes in SL only look sharp when looked at from the right angle. So I kept the inworld texturing for the bamboo legs, although I wanted to do more with them. All in all it was a big effort. But the end result isn't too bad, I think. Hehe, the pillow looks quite ordinairy, but it was pretty difficult to get the stripes right. Thanks Domino, Gaia and Chosen for your help! |